 Tweet
Tweet
OK ... Maybe I should post this over at the rim fire forum ...
However; since I got so much useful help here... I thought it would be best to share my experience here in this sub-forum.
OK ... Basically, I decided to build me one of those full custom 1022 receivers. When I 1st started this thing, I decided ... How difficult could it be to drill a few holes right?
Hoo boy was I wrong on that account! It turns out that there are a ton of stuff one needs to watch for when doing something like this ... even with the humble 1022 receiver. Anyhow ... here are some pics of the build and the final result.
First, I started with a Blackhawk Charger Axxiom Stock. Here is a pic of doing some of the machining on this thing to convert the stock from a pistol to a rifle configuration. Actually, this was more like exploratory surgery or machining on my part.

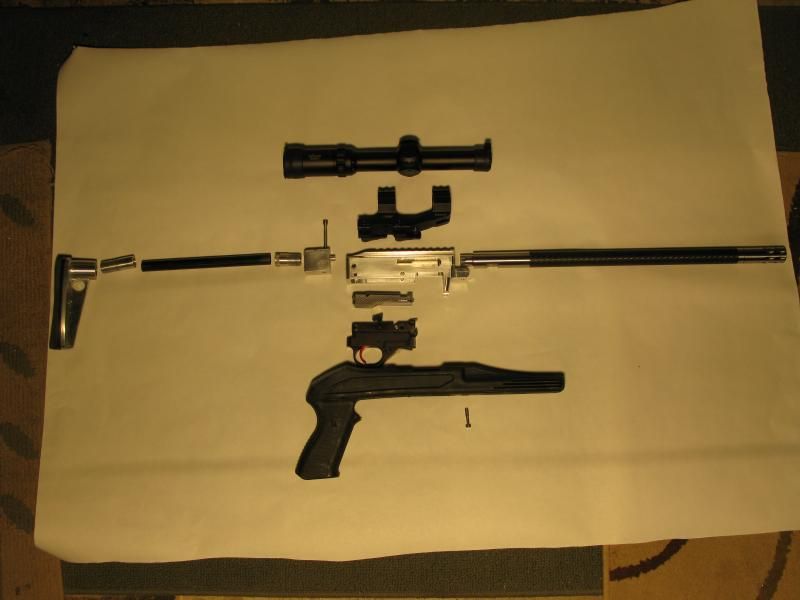
I really wanted two (2) takedown screws to attach the receiver assembly to the stock. This meant I needed to make an adapter for the rear of the receiver. This adapter was also used to attach the carbon fiber rod for the stock / buttplate assembly. Here is an exploded view to give you an idea of what this is all about.
Here is a pic of how I used a boring tool to bore out the main barrel hole. I bored this thing out about 0.0015" smaller in diameter than the barrel tenon. Yes ... I did measure EVERYTHING ... Just as Randall and KCSTOTT recommended!

Here is a closeup of the finished receiver with the barrel and trigger group installed. I did an electrochemical etch to get the serial number and other stuff placed onto the receiver.
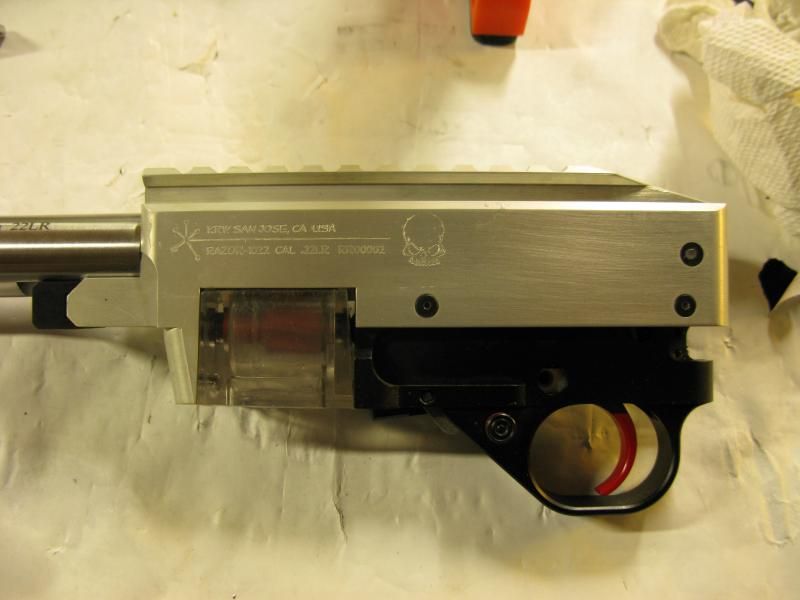
The barrel is a Volquartsen THM Carbon Fiber barrel. I got it on sale over at Midway. Unfortunately, I really wanted the forward compensator as shown on the link. Midway did not sell this option. However, Scott Volquartsen was very accommodating and told me all I had to do was send the barrel to him and pay for the compensator + S&H and he would put one on for me. The trigger group is the KIDD two-stage trigger group.
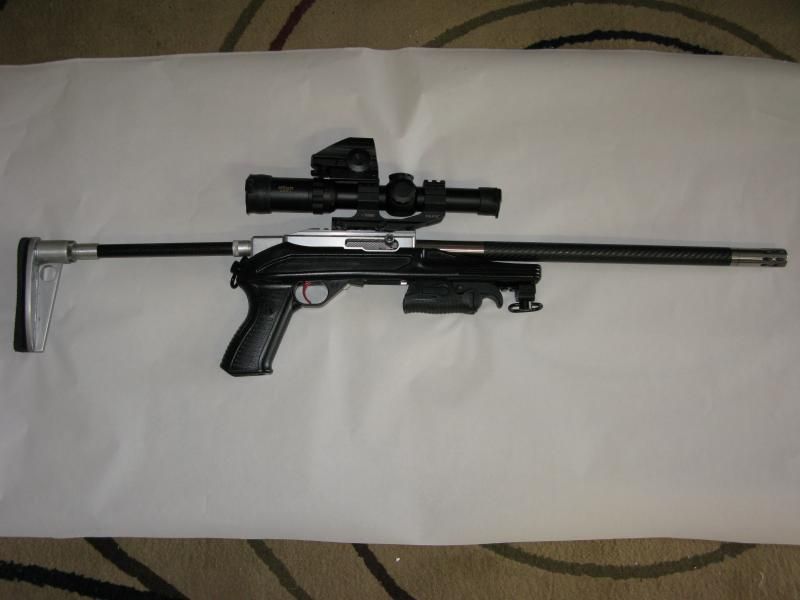
Here is a pic of the thing finally assembled and almost ready to go. I decided to put one of those Magpul multimission slings. I wanted the ability to have a single point and a two point sling for this thing. The forward grip is made by an outfit called GTI industries in Riverside California. The forward grip is very nice. It collapses into a potato grip for the long shots. It folds out for the tactical style and it also extends into a monopod Hill-billy style for bracing against a stump or whatever for those long shots on small critters!

Here is a pic with the reflex sight installed. This thing is one of those knock-off reflex sights with multiple reticules and red or green display.
And finally, here is a target of the 1st sight in I did a while back.... (5-shot group - Aguila SE HV ammo) This thing does shoot fairly well ... I think it probably shoots better than I am capable of.

Anyway ... I can say many thanks to all of you here at Calguns for helping me out with the machining and tips and all.
Ken
However; since I got so much useful help here... I thought it would be best to share my experience here in this sub-forum.
OK ... Basically, I decided to build me one of those full custom 1022 receivers. When I 1st started this thing, I decided ... How difficult could it be to drill a few holes right?
Hoo boy was I wrong on that account! It turns out that there are a ton of stuff one needs to watch for when doing something like this ... even with the humble 1022 receiver. Anyhow ... here are some pics of the build and the final result.
First, I started with a Blackhawk Charger Axxiom Stock. Here is a pic of doing some of the machining on this thing to convert the stock from a pistol to a rifle configuration. Actually, this was more like exploratory surgery or machining on my part.
I really wanted two (2) takedown screws to attach the receiver assembly to the stock. This meant I needed to make an adapter for the rear of the receiver. This adapter was also used to attach the carbon fiber rod for the stock / buttplate assembly. Here is an exploded view to give you an idea of what this is all about.
Here is a pic of how I used a boring tool to bore out the main barrel hole. I bored this thing out about 0.0015" smaller in diameter than the barrel tenon. Yes ... I did measure EVERYTHING ... Just as Randall and KCSTOTT recommended!
Here is a closeup of the finished receiver with the barrel and trigger group installed. I did an electrochemical etch to get the serial number and other stuff placed onto the receiver.
The barrel is a Volquartsen THM Carbon Fiber barrel. I got it on sale over at Midway. Unfortunately, I really wanted the forward compensator as shown on the link. Midway did not sell this option. However, Scott Volquartsen was very accommodating and told me all I had to do was send the barrel to him and pay for the compensator + S&H and he would put one on for me. The trigger group is the KIDD two-stage trigger group.
Here is a pic of the thing finally assembled and almost ready to go. I decided to put one of those Magpul multimission slings. I wanted the ability to have a single point and a two point sling for this thing. The forward grip is made by an outfit called GTI industries in Riverside California. The forward grip is very nice. It collapses into a potato grip for the long shots. It folds out for the tactical style and it also extends into a monopod Hill-billy style for bracing against a stump or whatever for those long shots on small critters!
Here is a pic with the reflex sight installed. This thing is one of those knock-off reflex sights with multiple reticules and red or green display.
And finally, here is a target of the 1st sight in I did a while back.... (5-shot group - Aguila SE HV ammo) This thing does shoot fairly well ... I think it probably shoots better than I am capable of.
Anyway ... I can say many thanks to all of you here at Calguns for helping me out with the machining and tips and all.
Ken


Comment