
 Tweet
Tweet
Not sure what to put down now.
-
-
Great looking builds BTW, really nice work and beautiful looking finishes
on the TM's and the SS Commander version...
You touched upon a few points that many builders should consider:
> Try to buy the highest quality parts you can afford, which usually
means well known name brand parts like: Wilson Combat, Ed Brown,
Chip McCormick, Caspian, etc.
> For things like high ride beavertail grip safeties avoid non standard
radius cuts such as the .220" cut used in the Smith & Alexander
versions vs. the .250" radius cuts that are generally Industry
standard...Unfortunately the OP found this out the hard way...
> Buy/rent/borrow the correct tools and jigs/fixtures needed for the
job at hand...otherwise, you will be spend more time fitting parts and
getting frustrated when it doesn't fit correctly...
> Specialty work like finishing/re-finishing/finish coating/hot bluing etc,
are better left to the pro's unless you have the equipment and skill to
do it yourself...
> Do a lot of research on the web and look Into places like YouTube to
get a good Idea on building 1911's to help avoid common and sometimes
expensive mistakes when fitting/building your prized 1911 pistol...
Just keep in mind this is NOT a low cost hobby , but when done
correctly It can be a cherished piece to hand downed to your loved ones
with the added pride that you had finished a custom 1911 build yourself...
The OP's pistols came out virtually flawless and function just as good as
they look in part because he was willing to spend the money needed to
get pro quality level pistols...
One last tid-bit, In fairness to TM, they have always had excellent products
and customer service, and they have had Issues with their vendor who
does their castings and are trying to get that resolved from what I under-
stand...**************************************************
Developer of the 6.5mm & 6.8mm Patriot Combat Cartridge .
**************************************************
It is up to us to defend the US Constitution & the American Way ! -
Originally posted by chrisinlb
I'm guessing you meant to say a 9mm/38 Super firing pin (Caspian and many others use this to help avoid problems with primer flow/intrusion,
etc. with the .45 ACP caliber slides)...of course if your firing a .45 ACP and have a 9mm/38 Super ejector it will malfunction...
Which brings me to this side note, 1911 in 9mm/38 Super is really a nice
soft shooting pistol, especially if it is a full size version (5" Bbl.)...with
the advantage of firing lower cost ammo (9x19/9mm NATO).
Back in the day, did a lot of .45 to 9mm conversions for the 1911
Gov't model, they were quite accurate and dependable btw...
Enjoy.**************************************************
Developer of the 6.5mm & 6.8mm Patriot Combat Cartridge .
**************************************************
It is up to us to defend the US Constitution & the American Way !Comment
-
For less than $400.00 (a lot less) you could buy everything you need to Cerakote them yourself, and then you would have it all for future builds.Comment
-
I have been using the kitchen oven with no residual smells. Old ovens can be picked up on Craigslist for free - $50.00.Comment
-
You can use a good quality blow dryer for your Initial drying then a large toaster oven
or a old kitchen oven for your full curing...just make sure you have a
accurate thermometer to place in the oven (300-350 deg,) is the
temp range you are looking for...
Good luck.
Last edited by Dr69er; 10-02-2015, 1:03 PM.**************************************************
Developer of the 6.5mm & 6.8mm Patriot Combat Cartridge .
**************************************************
It is up to us to defend the US Constitution & the American Way !Comment
-
What was your process to do the sand and scotch brite finish? It looks really nice. I have the same gun and was think of bead blasting it, but may be interested in doing it the way you did.Comment
-
Thanks! I really appreciate the nice write up. Take care!Comment
-
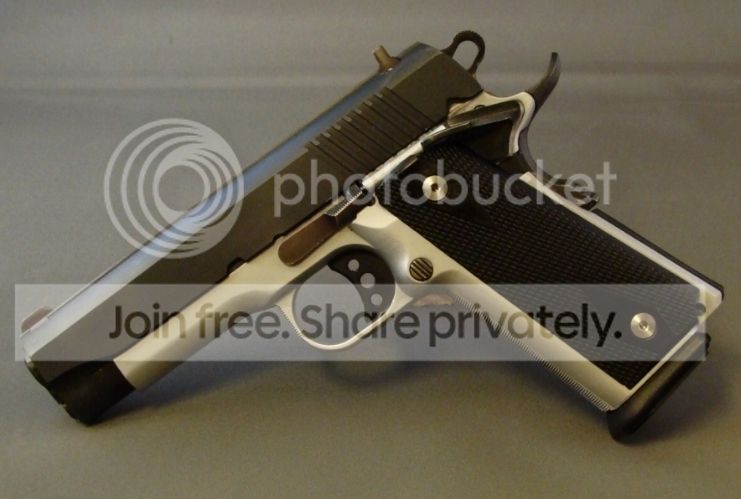
Guess I got my TM frame when they still had problems... frame was, as many have mentioned less that satisfactory... I did a couple on aluminum stealth arms frames. And one I am working on now is 1911 builders. Wonderful frame. No issues whatsoever. The S&A beavertail was interesting to fit. Had to remove a bunch of meat off the bottom. The tangs on 1911 frames I have are not cut at all, but with 220 radius S&A grip safety exposed a gap on the bottom, so I assume a 250 radius would not fit better.Last edited by MosinVirus; 10-03-2015, 9:48 PM.Hobbies: bla, bla, bla... Bought a Mosin Nagant... Guns, Guns, Guns...Comment
-
"This was the most difficult thing to do. I enjoyed this and when it was finished I felt a great sense of accomplishment. Not to be confused with wanting to do it again. "
"
LOL.
Been there, done that.

Originally posted by Citadelgrad87Comment
-
Thanks, I just caught myself thinking that it wasn't my build thread and went back to putting in my 2 cents on the subject, intstead of clogging up the original thread. I still have that TM frame laying around. I did correct all the major problems with it but decided to not proceed.Originally posted by liber
I mistyped originally, I think that if the .220 radius had a gap on the bottom between the tangs and beavertail, a .250 radius would likely have a larger gap.Originally posted by chrisinlb
Here is the gap I was talking about when I blended the first (bump-less) grip safety. And yes, the first safety didn't have the uniform radius, so on the top it opened up quite a bit:


Then I decided to replace the bumpless with the current one. Still S&A, but this one fit better, simply proving that they are not all the same.
I feel like I have to point out that the comp is permanently attached...
It is a EGW 8 port cone comp, and I am using a Kart 9mm (non-easy-fit) non ramped or standard barrel 5". I am still thinking about making a comp install video for YouTube. will see.
Nighthawk 9mm slide (which had to be sent back because it was a bit out of spec). Nighthawk was awesome about replacing it.


If you are planning to do something like this with your magwell MSH, and are looking for an alternative to the very expensive ($180) Wilson Combat Round butt 1 piece MSH, Brownells has S&A Mag Guides ($80). Yes this is one I am using here, and yes it is called a mag Guide, which is why I didn't find it originally and almost went for the Wilson Combat one.
Here is how it looked before I cut it.

And after:

I got mine in flat, then "round butted" it, then checkered the remaining flat pad.Last edited by MosinVirus; 10-04-2015, 4:00 AM.Hobbies: bla, bla, bla... Bought a Mosin Nagant... Guns, Guns, Guns...Comment
-
Thank you. Well, since you don't mind, I will bring more pictures back above. And as I said above I will probably make a video on the comp install soon.Originally posted by chrisinlbLast edited by MosinVirus; 10-06-2015, 6:52 PM.Hobbies: bla, bla, bla... Bought a Mosin Nagant... Guns, Guns, Guns...Comment
-
I have another 1911 builders frame (or two), and I have a .250 radius STI Grip safety (or two) laying around, so I guess the easiest would be for me to fit one and see. I will report back with pictures in a couple of days, though it seems at the very start of the thread we already saw .250 radius on the frame, so maybe it is a non-issue.Originally posted by liberHobbies: bla, bla, bla... Bought a Mosin Nagant... Guns, Guns, Guns...Comment
-
I went with a Brown grip safety for my Para gunsmith frame kit build.
The Brown allows the highest grip possible.
However, back in the day there were no jigs to fit these...it was strictly a hand fit deal.
For my first fitting, I made it look as nice as possible.
Nice square edges.
But when shooting the edges were too sharp and ate up the web of my hand.
To heck with looks, I want it to work right and be bite-free.
The squared edges were smoothed and radiused until I had the comfort I wanted.
Yup, the Brown was a big bite to chew on for my first build and took a ton of hours for the fitting of it.
Yes, I'm happy with the end result, but no, I'm not looking forward to doing another one soon.
Originally posted by Citadelgrad87Comment
-
I never even held a "high" capacity 1911. Wonder how it feels compared to the single stack. Looks great, and definitely appears that the grip is as high as it can go. It looks like it is more of a flat under the tangs and the beavertail. is that right? How does that feel as compared to the usual rounded bottom?Hobbies: bla, bla, bla... Bought a Mosin Nagant... Guns, Guns, Guns...Comment


There are currently 8370 users online. 123 members and 8247 guests.
Most users ever online was 239,041 at 10:39 PM on 02-14-2026.


Comment