

 Tweet
Tweet
I posted this up on the Saiga forum, but I also wanted to share my new gem with my fellow Cali Folks.
Little background, I purchased this Saiga 12 new from my LGS in the original hunting/sporting form with the FCG moved to the rear and without a PG. As many of you know this is not how this shotgun was originally designed, so just like everyone else I set out to convert the firearm back to its original intended state. If your interested in converting your Saiga, just watch the CSS videos as that was all i needed to get the job done.
The conversion process was one intimate lesson on how to get to know your Saiga Shotgun. I said that I would run into road blocks, and I swear everything that could have been an issue, was. I know lots of people say do it yourself, and I would agree as long as your handy with some tools (some of the parts require fitment). Below is just a brief recap of some of the issues I encountered while doing the conversion.
I started the conversion at 730 pm with laying all my tools and conversion parts on a table, making sure that I had all parts and organized them according to install procedures. A quick inventory of what I ended up with just in case someone else is wondering:
Conversion Parts:
CSS Basic Conversion Kit
-Tromix G2 FCG
-CSS Trigger Guard
-Plastic plugs
-Safety Stop
Modified BHO (optional)
Axis Retaining Plate (optional)
JTE Power Hammer Spring (optional)
Tools:
Drill
3/16 Drill Bit (Cobalt, and not High Speed Steel), also additional bits to drill holes for the stock that I used.
Needle Nose Pliers
Screwdriver (+,-)
Vise Clamps
Hook Tool (helpful with the springs)
Drill out the rivets - "have the right tools for the job" that saying kept repeating over and over as I destroyed two high speed drill bits. That Russian steel is no joke! It took a while to get the first two side rivets out as the bit was wearing dull, a quick trip out to the store for some cobalt bits cured that immediatly. After I had the right bit the rivets just cut out like butter, and were easily punched out. Bam no more stock trigger guard.
FCG: Removal of the FCG was simple enough, things came apart rather quick, but I must have skipped a step and stupid me forgot to disengage the hammer before I removed the rear axis pin, so the trigger itself had already been removed. No big deal, I was able to disengage the hammer with some fiddeling around. Be sure to watch out for those hammer springs when you bring them back around the hammer, ouch! Zipties or something similar are a definite must!
BHO: This was a pain in the ***. I tried using the approach in the CSS videos, but just couldnt get it done that way. I ended up getting the spring around the axis pin first, then I lifted up the end of the spring which is bent, up and over the BHO notch, which IMO was much easier, and in fact I had to do this three times because of the next issue!
Axis Retaining Plate: So like everyone recommended I opted for the axis retaining plate instead of the stock shepards crook (sp?). One thing to note is that make sure that when you are installing the plate, it securely locks down on the axis pins grooves. I had an issue where the plate was not fully seated in the grooves of the rear pin, and the axis pin would push out on its own. I of course found this out when I had the gun fully assembled and thought I was done, only to rack the bolt and see the axis pins push out from the vibration.
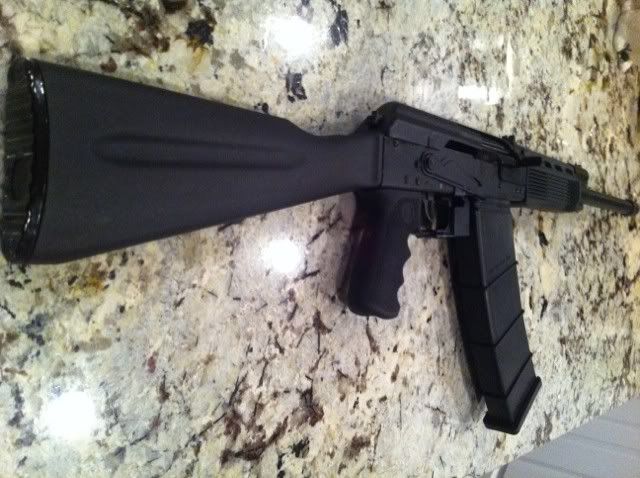
Furniture: Both my Kvar stock and Hogue Grip required removing material from the parts to mount. The KVAR stock required me tro drill two holes, and also file down the bottom portion of the mounting block that slides into the reciever because the trigger guard rear-most screw was in the way ( this was a quick fix). The Hogue grip also required me to shave down the front portion which butts onto the trigger guard itself for proper allignment. I actually had to take off a good amount of material before I could get it perfectly straight.
Ok at about this time its 11 pm, and I have moved on from beer to whiskey. Its late, im tired, buzzed, and feeling like I just want to sleep. For some reason in my half awake state I couldnt get the safety lever installed after locking into the rear hole of the axis plate. The lever would not push down to clear the trigger assembly! I eventually got it in somehow, but I still have no idea what the issue was. Now that Im sober and awake, i'll have to look into that issue more.
Once the job was complete around midnight, I was able to finally shoulder the weapon, and wow! what a difference. I can see now why this is a must, seems like a brand new gun to me. Balance and feel were excellent. and the trigger pull is smooth and crisp thanks to the tromix FCG and JTE spring.
In summary, was I glad I did it myself? YES! I can take apart this saiga with ease and could only have learned that through my struggles last night with the conversion. Do I recommend it for everyone? definitley not. I have a few friends that I know would have gotten stuck with some of the issues I ran into.
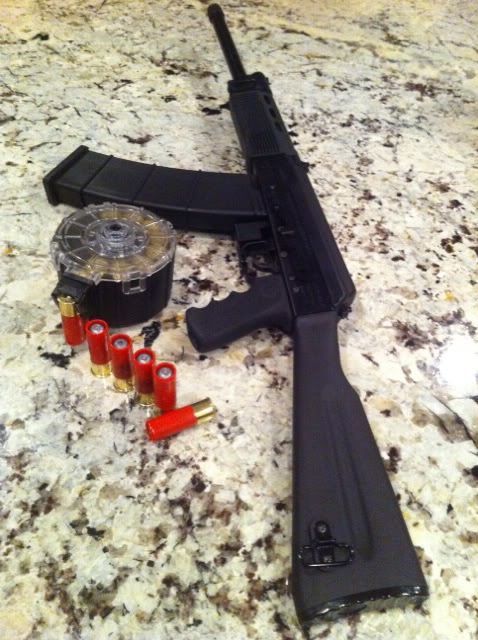
Heres a pic of the completed project for now, nothing special as I wanted to keep it simple, no quad rails or anything like that. I still have to change the handguard and also add a muzzle device.

Little background, I purchased this Saiga 12 new from my LGS in the original hunting/sporting form with the FCG moved to the rear and without a PG. As many of you know this is not how this shotgun was originally designed, so just like everyone else I set out to convert the firearm back to its original intended state. If your interested in converting your Saiga, just watch the CSS videos as that was all i needed to get the job done.
The conversion process was one intimate lesson on how to get to know your Saiga Shotgun. I said that I would run into road blocks, and I swear everything that could have been an issue, was. I know lots of people say do it yourself, and I would agree as long as your handy with some tools (some of the parts require fitment). Below is just a brief recap of some of the issues I encountered while doing the conversion.
I started the conversion at 730 pm with laying all my tools and conversion parts on a table, making sure that I had all parts and organized them according to install procedures. A quick inventory of what I ended up with just in case someone else is wondering:
Conversion Parts:
CSS Basic Conversion Kit
-Tromix G2 FCG
-CSS Trigger Guard
-Plastic plugs
-Safety Stop
Modified BHO (optional)
Axis Retaining Plate (optional)
JTE Power Hammer Spring (optional)
Tools:
Drill
3/16 Drill Bit (Cobalt, and not High Speed Steel), also additional bits to drill holes for the stock that I used.
Needle Nose Pliers
Screwdriver (+,-)
Vise Clamps
Hook Tool (helpful with the springs)
Drill out the rivets - "have the right tools for the job" that saying kept repeating over and over as I destroyed two high speed drill bits. That Russian steel is no joke! It took a while to get the first two side rivets out as the bit was wearing dull, a quick trip out to the store for some cobalt bits cured that immediatly. After I had the right bit the rivets just cut out like butter, and were easily punched out. Bam no more stock trigger guard.
FCG: Removal of the FCG was simple enough, things came apart rather quick, but I must have skipped a step and stupid me forgot to disengage the hammer before I removed the rear axis pin, so the trigger itself had already been removed. No big deal, I was able to disengage the hammer with some fiddeling around. Be sure to watch out for those hammer springs when you bring them back around the hammer, ouch! Zipties or something similar are a definite must!
BHO: This was a pain in the ***. I tried using the approach in the CSS videos, but just couldnt get it done that way. I ended up getting the spring around the axis pin first, then I lifted up the end of the spring which is bent, up and over the BHO notch, which IMO was much easier, and in fact I had to do this three times because of the next issue!
Axis Retaining Plate: So like everyone recommended I opted for the axis retaining plate instead of the stock shepards crook (sp?). One thing to note is that make sure that when you are installing the plate, it securely locks down on the axis pins grooves. I had an issue where the plate was not fully seated in the grooves of the rear pin, and the axis pin would push out on its own. I of course found this out when I had the gun fully assembled and thought I was done, only to rack the bolt and see the axis pins push out from the vibration.
Furniture: Both my Kvar stock and Hogue Grip required removing material from the parts to mount. The KVAR stock required me tro drill two holes, and also file down the bottom portion of the mounting block that slides into the reciever because the trigger guard rear-most screw was in the way ( this was a quick fix). The Hogue grip also required me to shave down the front portion which butts onto the trigger guard itself for proper allignment. I actually had to take off a good amount of material before I could get it perfectly straight.
Ok at about this time its 11 pm, and I have moved on from beer to whiskey. Its late, im tired, buzzed, and feeling like I just want to sleep. For some reason in my half awake state I couldnt get the safety lever installed after locking into the rear hole of the axis plate. The lever would not push down to clear the trigger assembly! I eventually got it in somehow, but I still have no idea what the issue was. Now that Im sober and awake, i'll have to look into that issue more.
Once the job was complete around midnight, I was able to finally shoulder the weapon, and wow! what a difference. I can see now why this is a must, seems like a brand new gun to me. Balance and feel were excellent. and the trigger pull is smooth and crisp thanks to the tromix FCG and JTE spring.
In summary, was I glad I did it myself? YES! I can take apart this saiga with ease and could only have learned that through my struggles last night with the conversion. Do I recommend it for everyone? definitley not. I have a few friends that I know would have gotten stuck with some of the issues I ran into.
Heres a pic of the completed project for now, nothing special as I wanted to keep it simple, no quad rails or anything like that. I still have to change the handguard and also add a muzzle device.





 a Converted Saiga-12


 ). Hope you guys enjoy.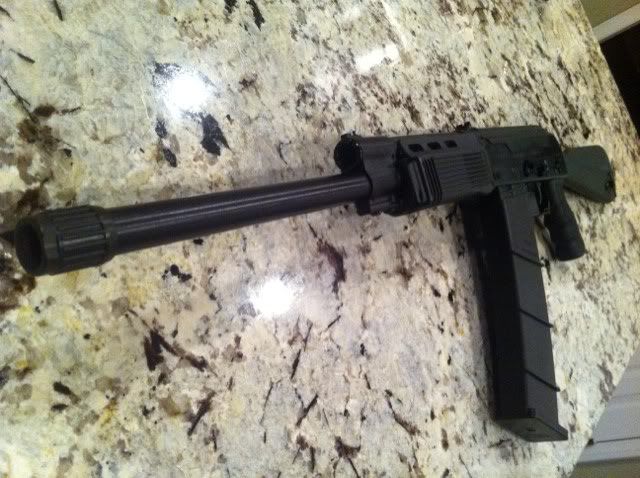




Comment