
 Tweet
Tweet
Greetings group,
I'm here today to discuss the fabrication of a full sized Cerakote curing oven. I recently (Jan,2015) built this curing oven. After conducting a lot of research in order to build an oven with professional results, I figured this may help other refinishers, and applicators, in their quest to construct their own oven. For my application I had specific requirements. The unit had to be large enough to accommodate large bore rifles up to 50", and other large items. It must reach at least 350*F for outgassing, and draw less than 20AMPs. It must also operate on standard household 110V-120V A/C. My cap for building this was <$1000...and, I was fine with that as s comparable commercially manufactured unit, that still didn't meet my requirements, cost in the ball park of $2700. I came in well under that by shopping around. It has seen plenty of use over the last year. It heats up to 300*F in ~15min. (winter time)
The Details:
Size: 20"Dx40"Wx70"T
Material: Galvanized Steel Construction (WEST Extended Storage Container)
Voltage: 110V-120V A/C
Watts: ~1,020-2,020
Amperage: 8.5-18.3 AMPS
Elements: (2) 1000w Coils
Element Shield: Yes
Controls: PID Controller
Switching: Solid State Relay (SSR)
Heat Sink: Yes
Hanging Rack: Adjustable
Insulation: Aluminum Faced .750" Foam Board
Lockable: Yes
Max. Temperature Reached: 525* F
Audible Alarms: Yes (Hi/Low)
Individual Element Switching: Yes
Cost: $825
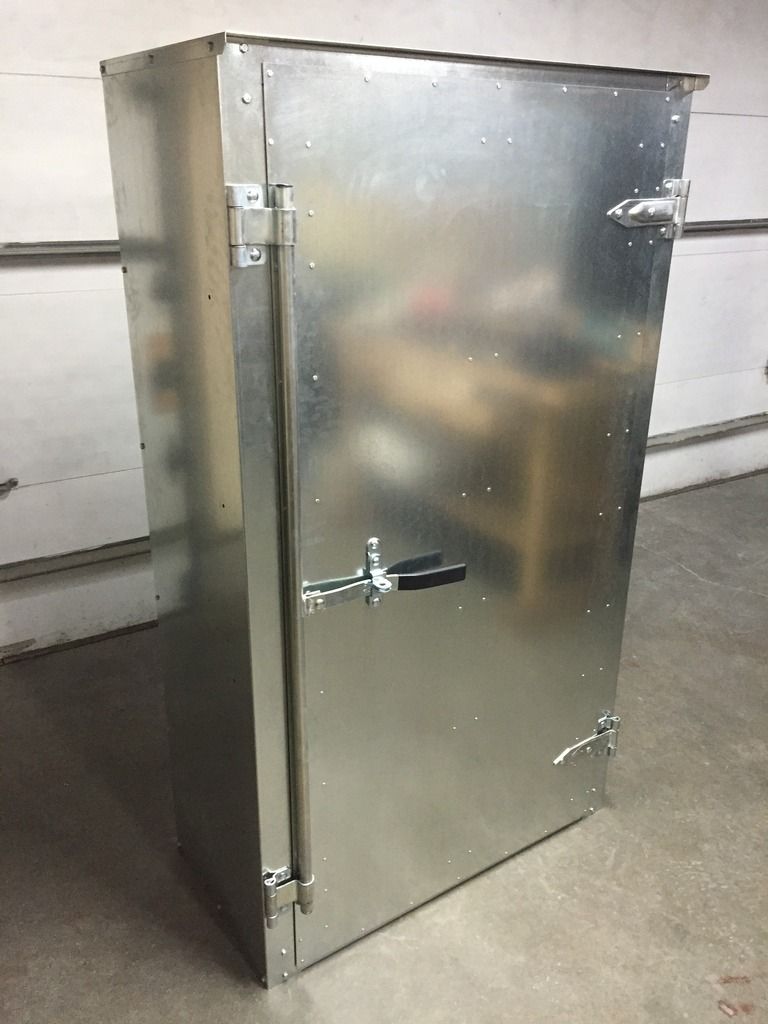
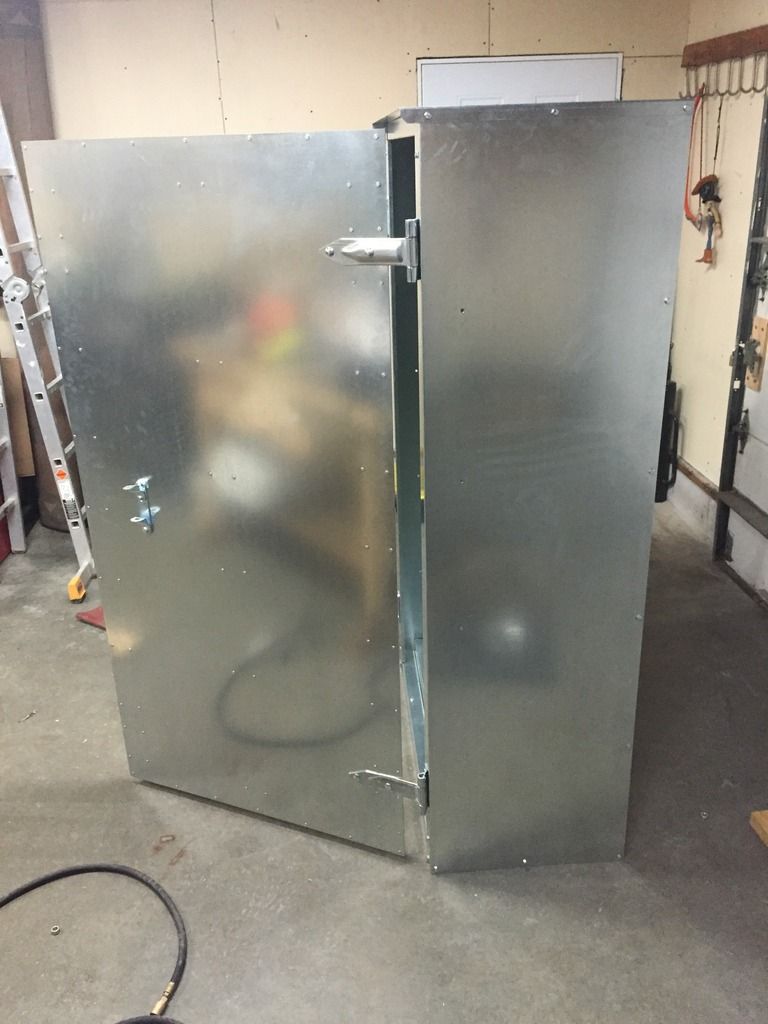
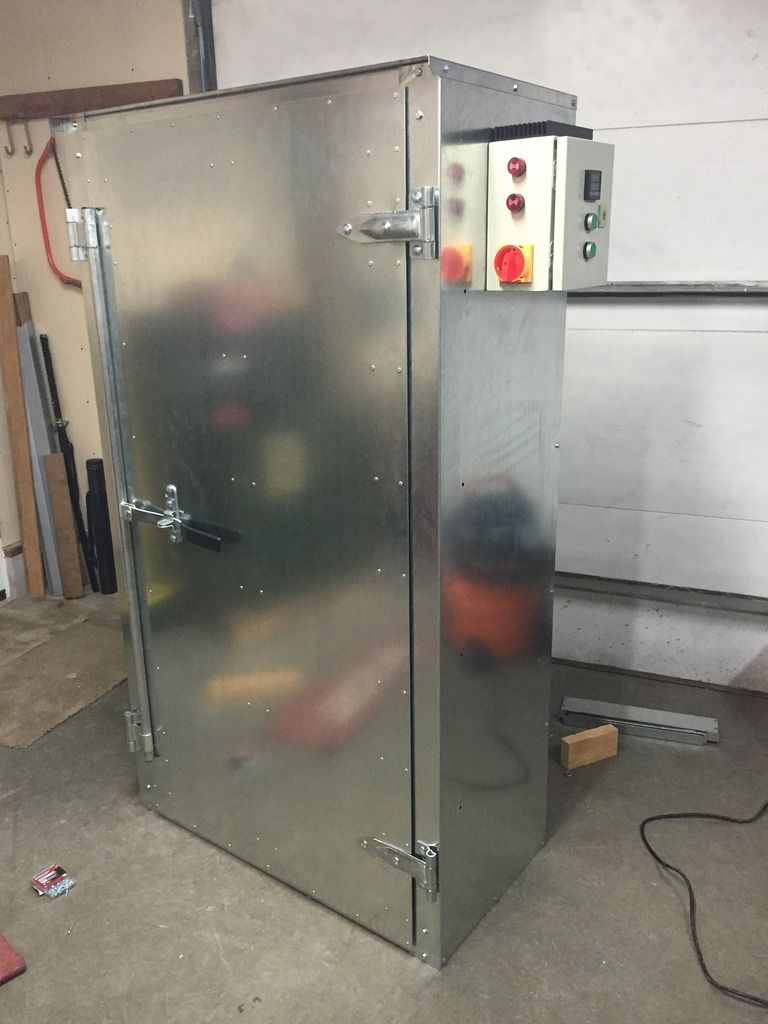
First thing on the agenda was to find a suitable enclosure. One that offered the dimensions, and adaptability that I required. I settled on this galvanized steel cabinet from my local hardware store (Mill's Fleet Farm). It came unassembled.

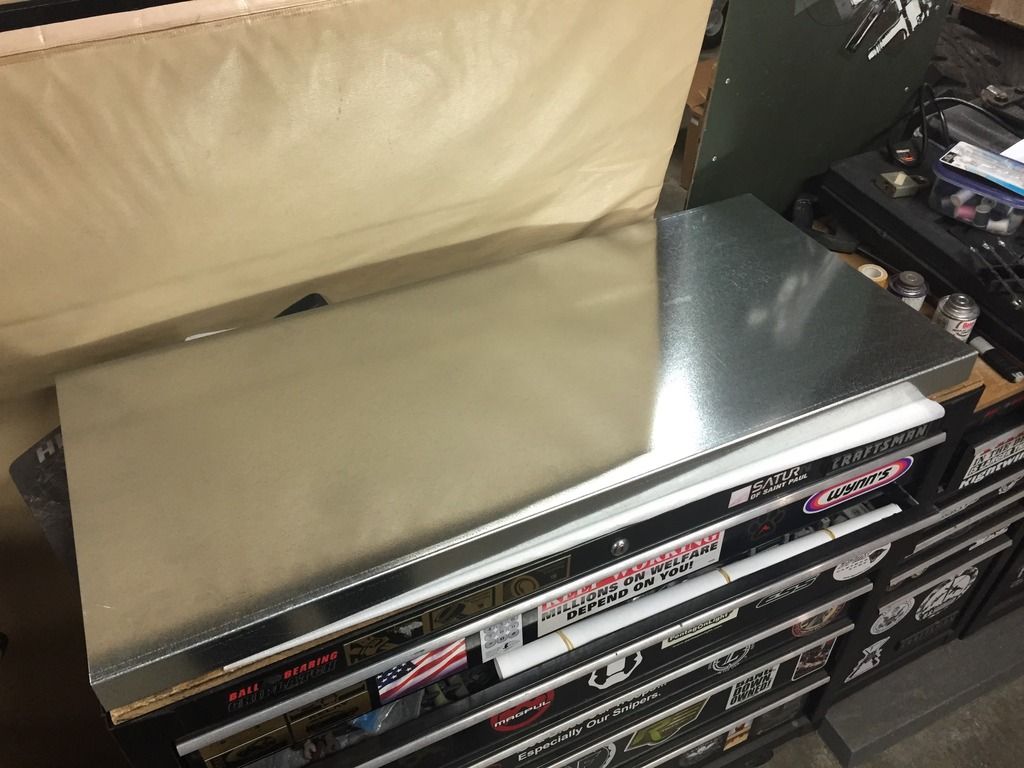
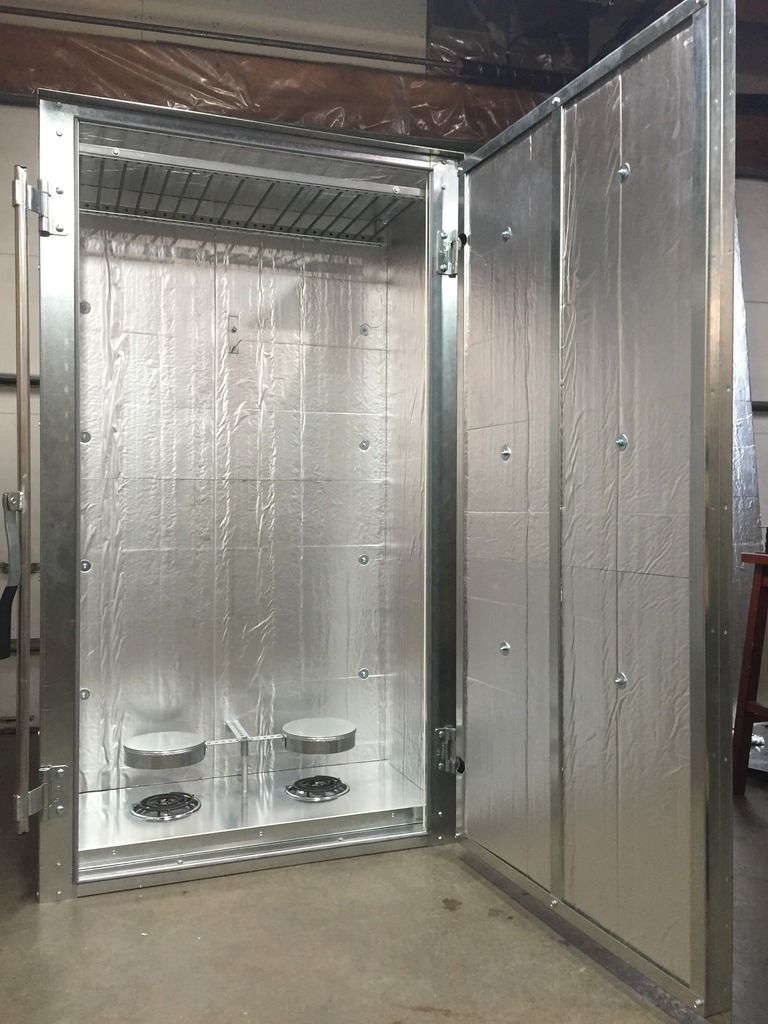
Once the enclosure was assembled, it was time to fabricate a platform for the heating elements and thermal wiring. I utilized on of the stainless steel shelves that came with the enclosure. I stared by measuring and cutting out the locating holes for each element, and then fittin the unit into the enclosure. At this point all of the wiring was initially mocked up to confirm connectability, routing, and safety (chaffing considerations).
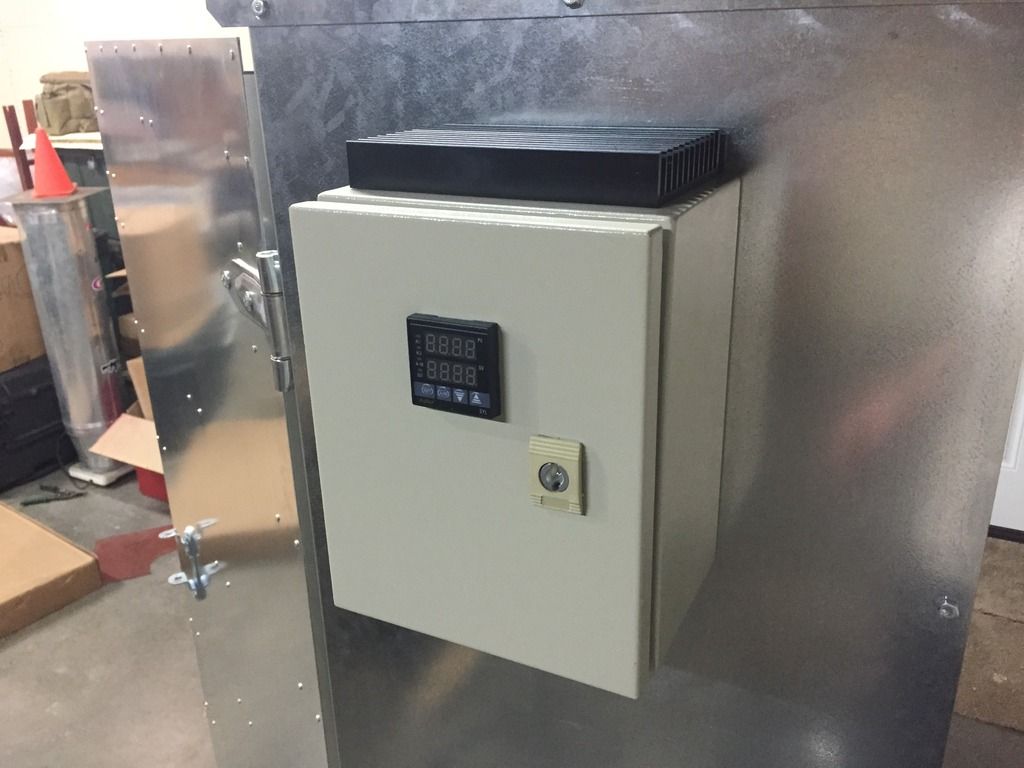
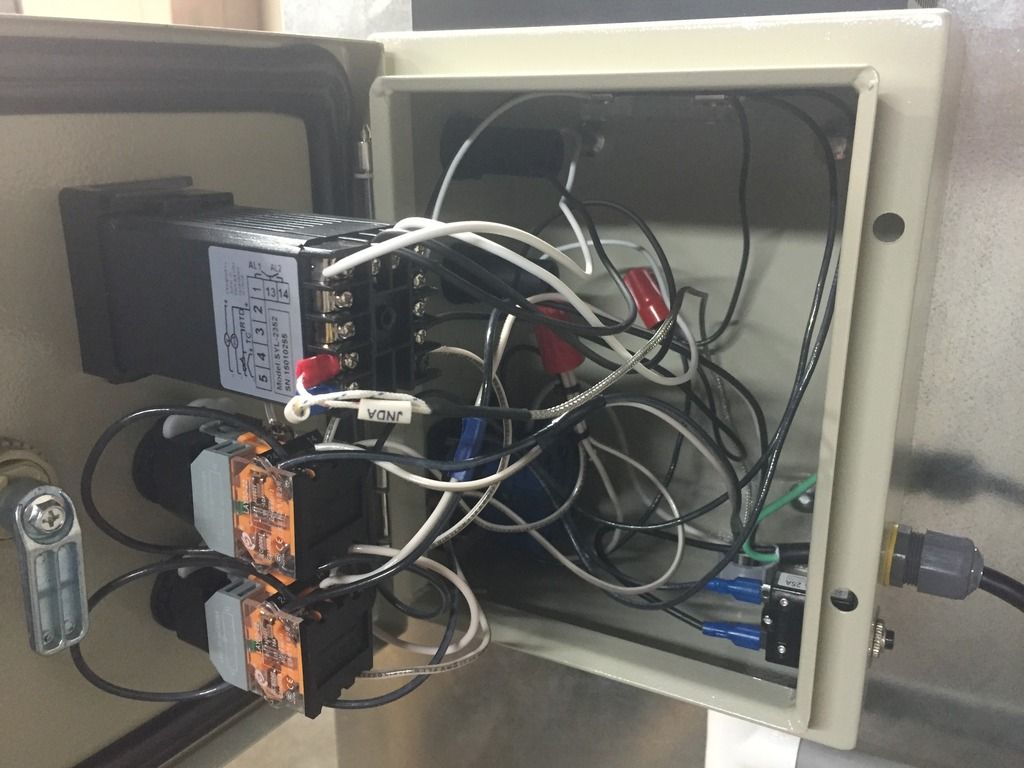
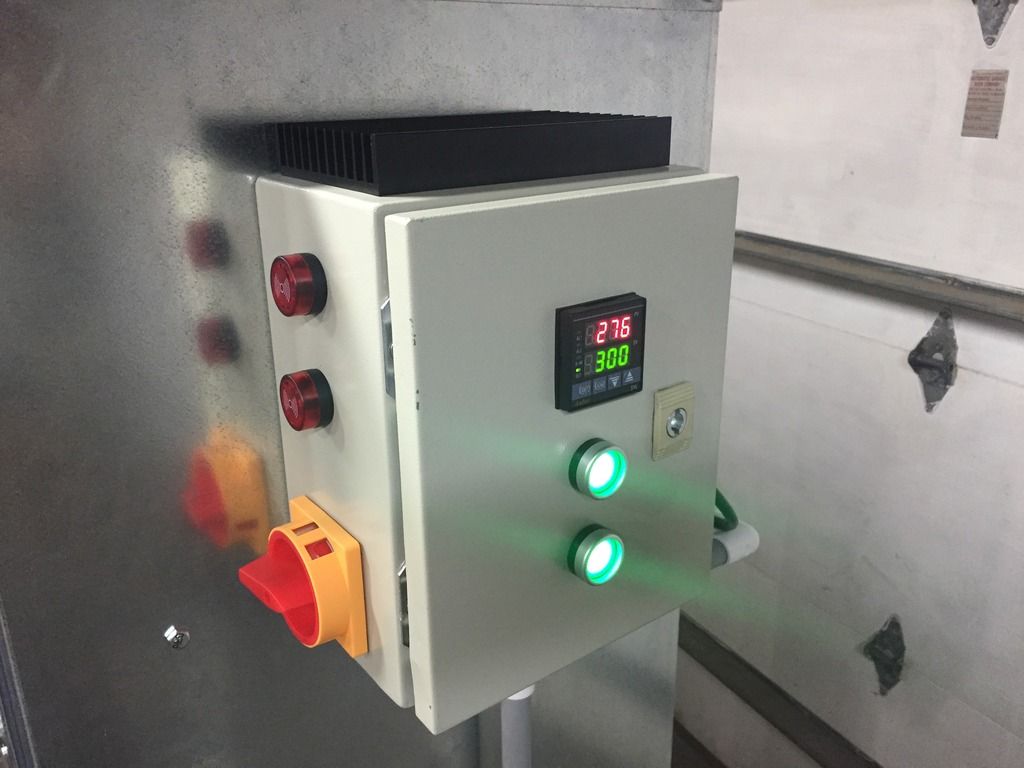
Once the platform for the elemnets was fabricated, fitted, and prewired. I started to ssemble the control panel. It started as a plain power box and was just the right size to accommodate (1) main power switch, (2) individual burner switches, (2) audible alarms, (1) PID controller, (1) SSR, (1) heat sink, (1) 20A circuit breaker, and all wiring. The box was then mounted to its location on the exterior of the enclosure.
After the control box had been mounted, installation of all the conduit for the wiring began. I used .50" PVC electrical conduit for routing the wires for the burners, control box, and thermocouple. Custom spacers were fabricated to mount the gang boxes for a secure installation. (Remember, theses ovens may have to be moved from time to time).
Once the conduit was installed, that laid the foundation to run all the wiring (main power cord, elements, and control box). For the burner platform I utilized high temperature wiring. The picture may look intimidating, but just follow your wiring diagram and double check everything as you go. Use the correct gauge wiring for each application, adhering to the specifications of each component to ensure electrical compatibility. (This boils down to research).
After all of the electrical components had been wired up, and double checked, it was time to install the thermal insulation. For the insulation I used .75" aluminum faced heat resistant foam board insulation. Once complete, installation of the final components was conducted (thermocouple, burner shields, and adjustable hanging rack).
Once fully assembled, a final inspection of all components was conducted and a complete test run of the system was run to ensure everything was functioning properly as designed.

...and, a complete success! I hope this helps any other refinishers, and applicators that are on the fence about building their own curing oven. It took about 2 weeks of research, and only about 3 days to build after all the parts arrived. I have also designed and built a cross-draft spray booth, and dust elimination system for my media blaster (those at a later date).
Good luck, and thanks for looking!
I'm here today to discuss the fabrication of a full sized Cerakote curing oven. I recently (Jan,2015) built this curing oven. After conducting a lot of research in order to build an oven with professional results, I figured this may help other refinishers, and applicators, in their quest to construct their own oven. For my application I had specific requirements. The unit had to be large enough to accommodate large bore rifles up to 50", and other large items. It must reach at least 350*F for outgassing, and draw less than 20AMPs. It must also operate on standard household 110V-120V A/C. My cap for building this was <$1000...and, I was fine with that as s comparable commercially manufactured unit, that still didn't meet my requirements, cost in the ball park of $2700. I came in well under that by shopping around. It has seen plenty of use over the last year. It heats up to 300*F in ~15min. (winter time)
The Details:
Size: 20"Dx40"Wx70"T
Material: Galvanized Steel Construction (WEST Extended Storage Container)
Voltage: 110V-120V A/C
Watts: ~1,020-2,020
Amperage: 8.5-18.3 AMPS
Elements: (2) 1000w Coils
Element Shield: Yes
Controls: PID Controller
Switching: Solid State Relay (SSR)
Heat Sink: Yes
Hanging Rack: Adjustable
Insulation: Aluminum Faced .750" Foam Board
Lockable: Yes
Max. Temperature Reached: 525* F
Audible Alarms: Yes (Hi/Low)
Individual Element Switching: Yes
Cost: $825
First thing on the agenda was to find a suitable enclosure. One that offered the dimensions, and adaptability that I required. I settled on this galvanized steel cabinet from my local hardware store (Mill's Fleet Farm). It came unassembled.
Once the enclosure was assembled, it was time to fabricate a platform for the heating elements and thermal wiring. I utilized on of the stainless steel shelves that came with the enclosure. I stared by measuring and cutting out the locating holes for each element, and then fittin the unit into the enclosure. At this point all of the wiring was initially mocked up to confirm connectability, routing, and safety (chaffing considerations).
Once the platform for the elemnets was fabricated, fitted, and prewired. I started to ssemble the control panel. It started as a plain power box and was just the right size to accommodate (1) main power switch, (2) individual burner switches, (2) audible alarms, (1) PID controller, (1) SSR, (1) heat sink, (1) 20A circuit breaker, and all wiring. The box was then mounted to its location on the exterior of the enclosure.
After the control box had been mounted, installation of all the conduit for the wiring began. I used .50" PVC electrical conduit for routing the wires for the burners, control box, and thermocouple. Custom spacers were fabricated to mount the gang boxes for a secure installation. (Remember, theses ovens may have to be moved from time to time).
Once the conduit was installed, that laid the foundation to run all the wiring (main power cord, elements, and control box). For the burner platform I utilized high temperature wiring. The picture may look intimidating, but just follow your wiring diagram and double check everything as you go. Use the correct gauge wiring for each application, adhering to the specifications of each component to ensure electrical compatibility. (This boils down to research).
After all of the electrical components had been wired up, and double checked, it was time to install the thermal insulation. For the insulation I used .75" aluminum faced heat resistant foam board insulation. Once complete, installation of the final components was conducted (thermocouple, burner shields, and adjustable hanging rack).
Once fully assembled, a final inspection of all components was conducted and a complete test run of the system was run to ensure everything was functioning properly as designed.
...and, a complete success! I hope this helps any other refinishers, and applicators that are on the fence about building their own curing oven. It took about 2 weeks of research, and only about 3 days to build after all the parts arrived. I have also designed and built a cross-draft spray booth, and dust elimination system for my media blaster (those at a later date).
Good luck, and thanks for looking!


Comment