Unconfigured Ad Widget

Collapse

CalGuns Swiss Rifle Central

Collapse
This topic is closed.
X
This is a sticky topic.
X
X
 
  • Time
  • Show
Clear All
new posts
  • Latigo
    Senior Member
    • Feb 2011
    • 2121

    CalGuns Swiss Rifle Central

    Guys, I'll ask that you not post on this thread until it's complete. Kestryll is going to make this a sticky thread for most all of the Swiss rifles info I can list here. You won't have to go anywhere else to get your basic information.

    We'll post a seperate Q&A thread a little later. In the meantime, I'll be adding info to this one over the next few days.
    So here we go. I've added a few inserts for the current changes in equipment.

    Recommended setup for reloading the 7.5x55 Swiss

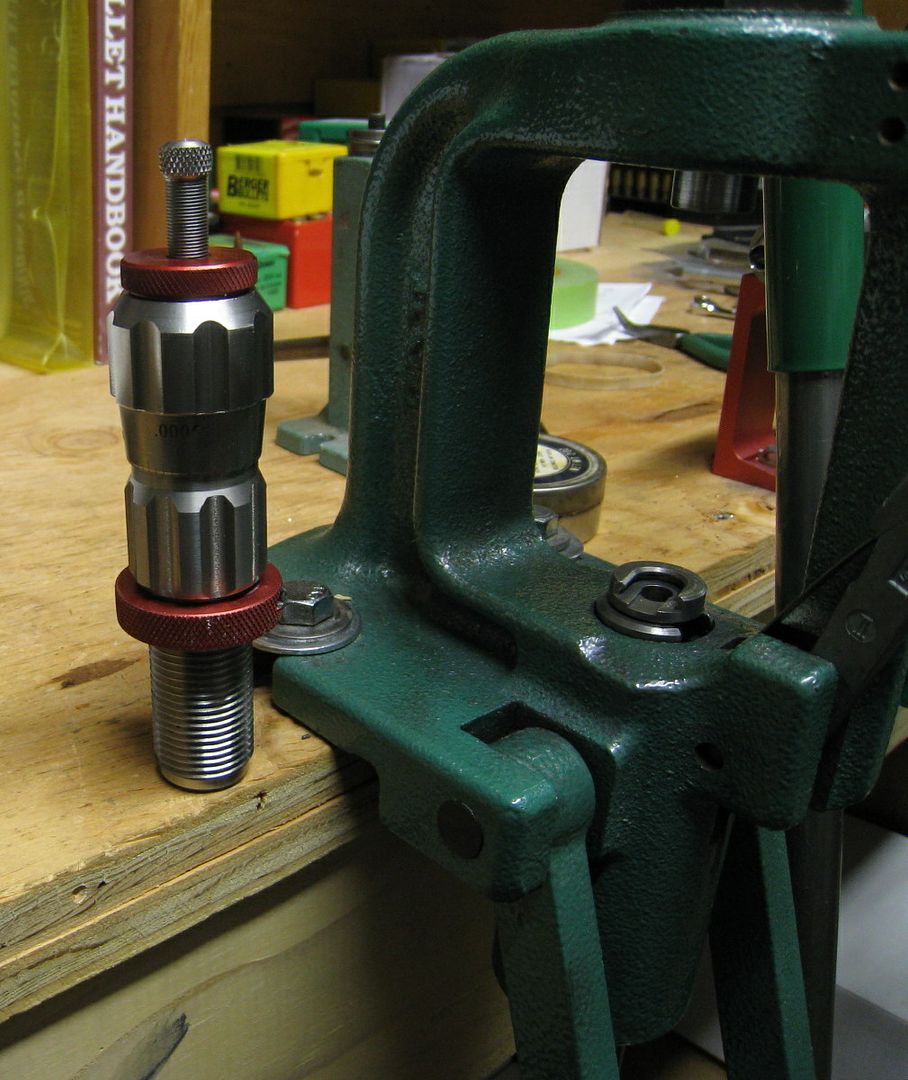
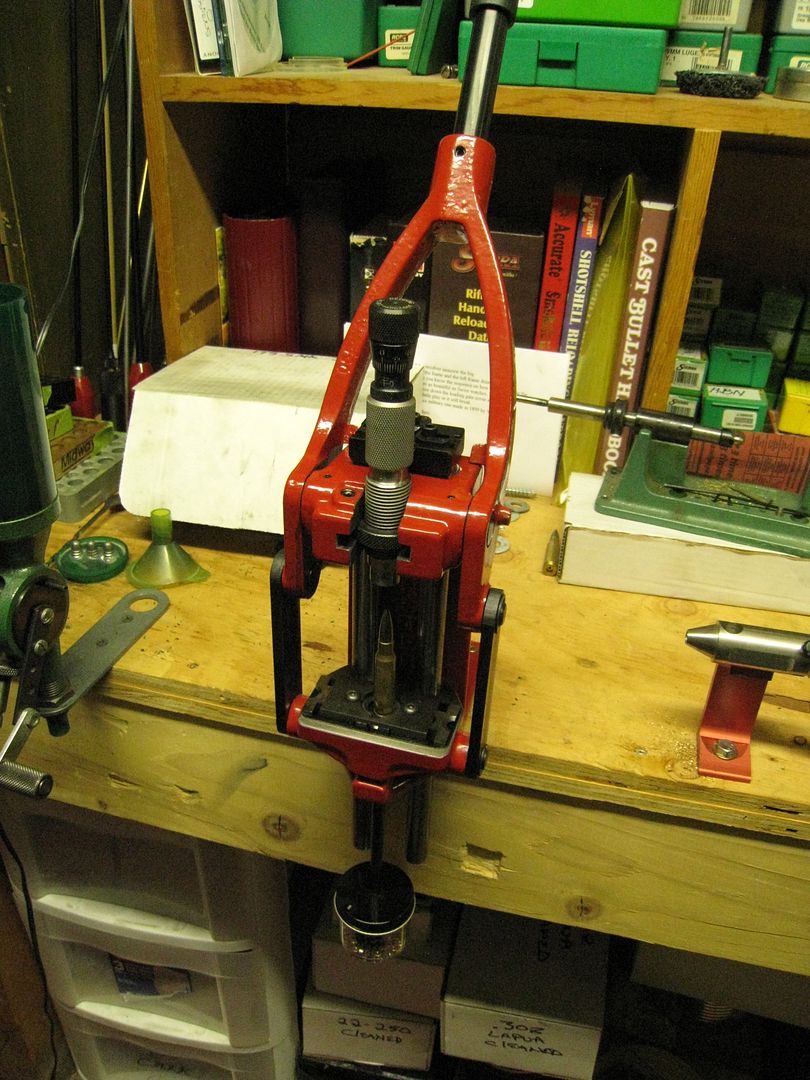
    A press, Forster (recommended) RCBS Rock Chucker or Dillon 550B
    (If its RCBS get the Primer Option)
    Dies for your caliber (RCBS, Redding, Hornady etc.)
    Spray lubricant and case neck brush, or
    Castor Oil (recommended)

    Wooden or plastic case block to hold 50 cases
    Powder Dispenser (RCBS)
    Powder scale
    Case mouth Funnel
    Powder Trickler
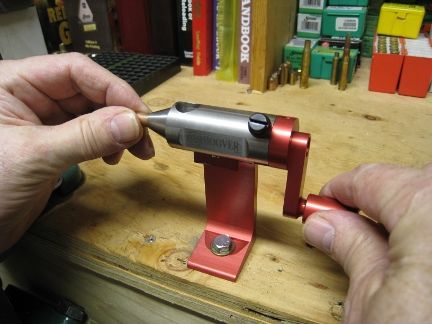
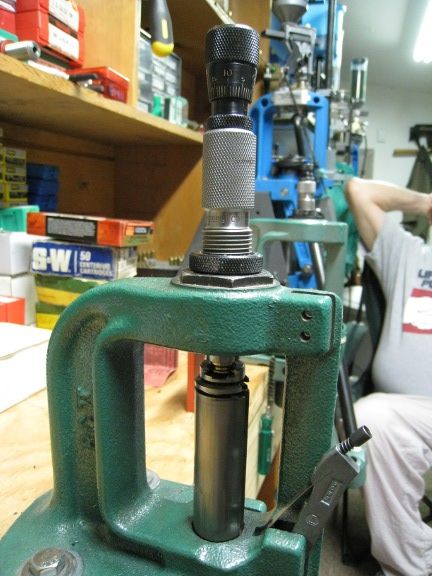
    Manual Case Trimmer with collet for your caliber. Wilson (recommended)
    or RCBS.

    Reamer/Champfer for case mouths
    Calipers to measure case lengths
    Powder and Primers.
    Sierra Reloading Manual (recommended)

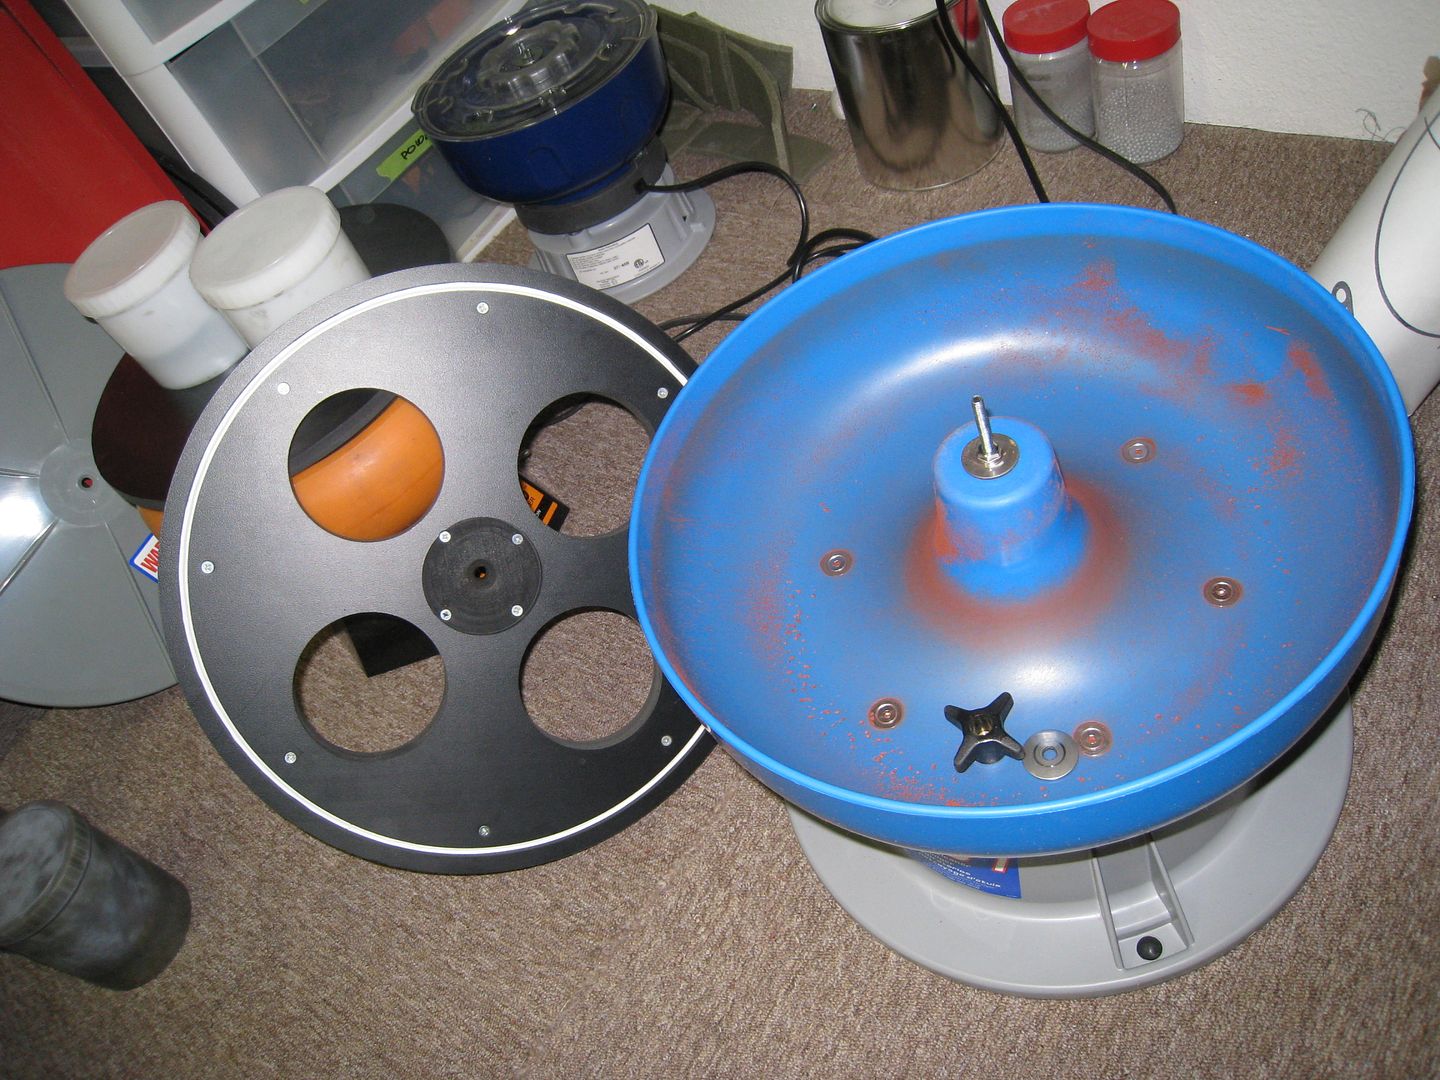
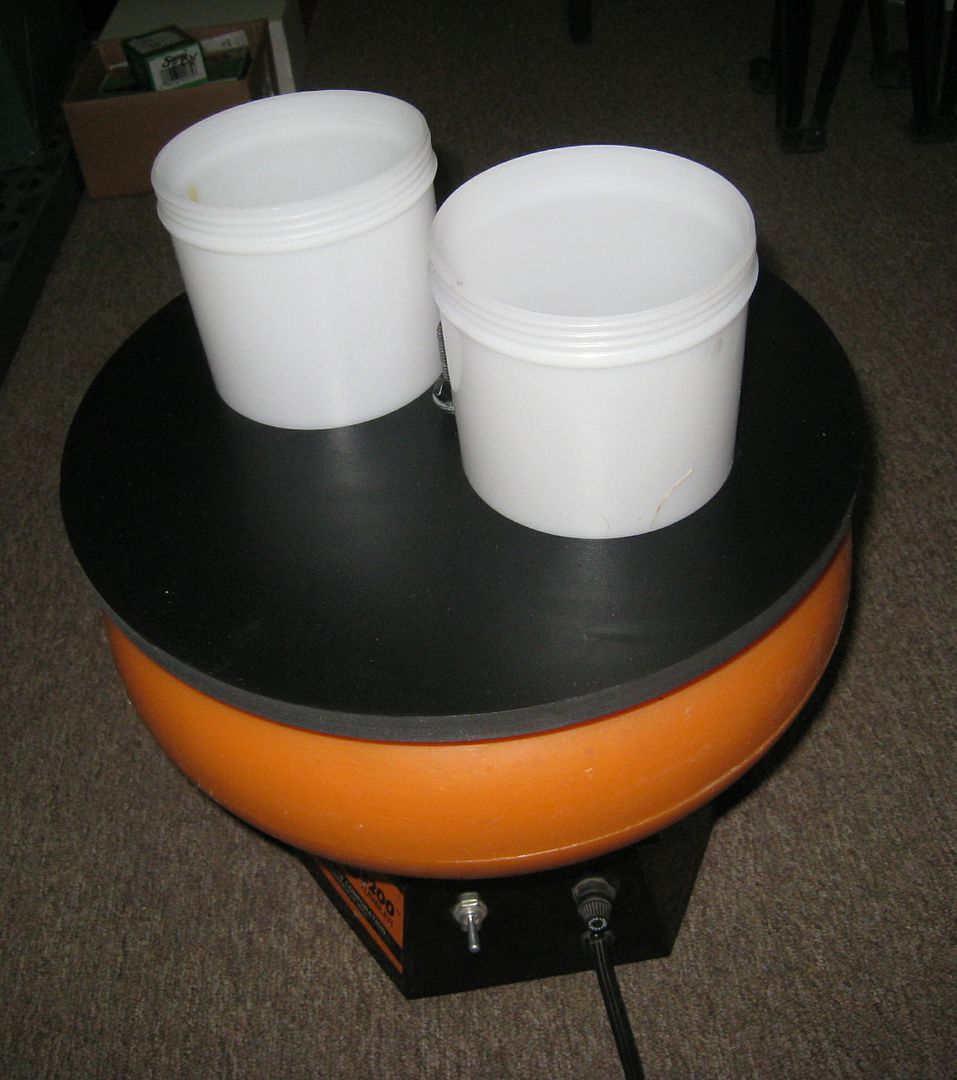
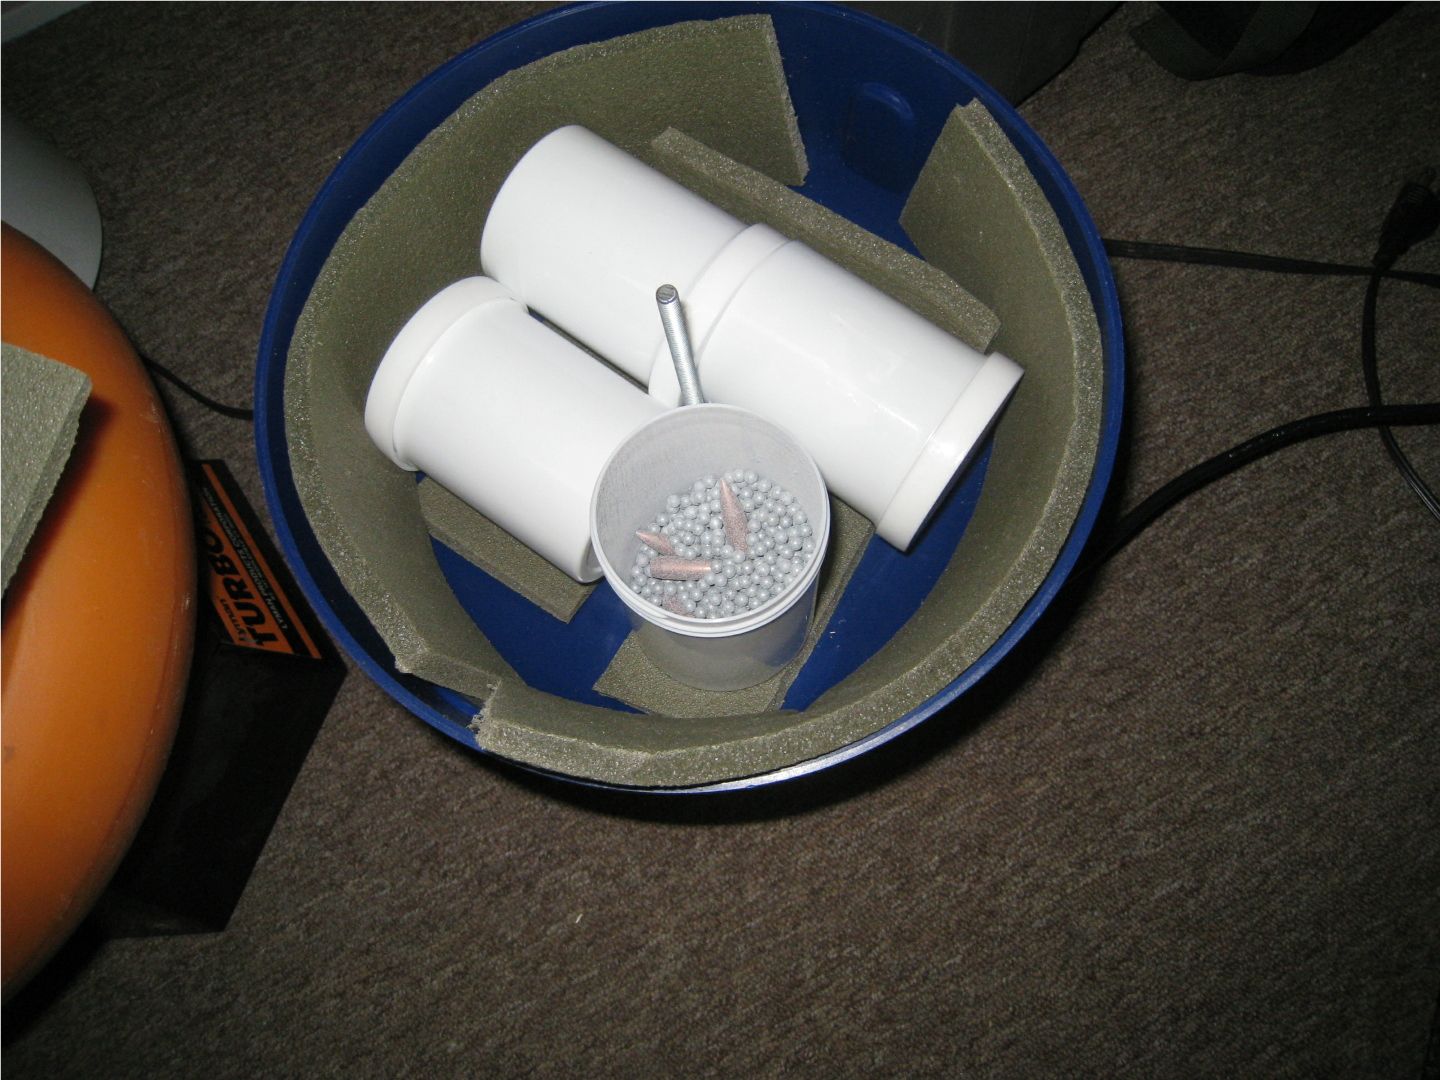
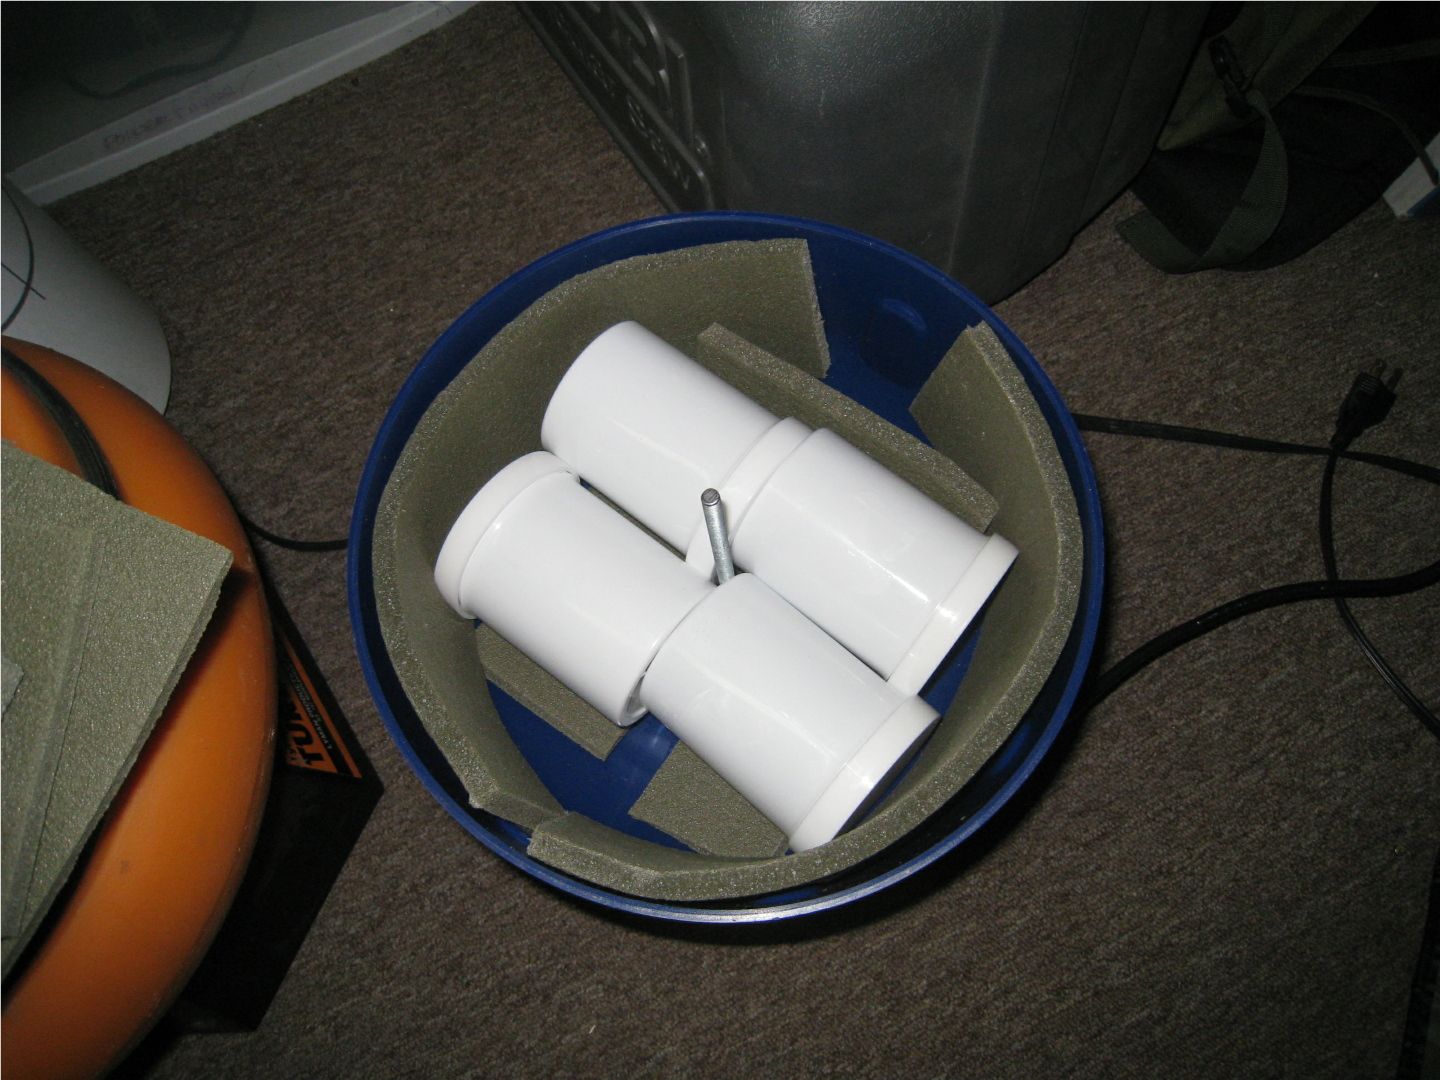
    If you shoot very much you really do need a Case Tumbler.
    Dillon or Lyman are the best.
    Case tumbler medium, walnut preferred.


    -----------------------------------------------------------------------------------

    I'm posting this here so it's easier for me to find and access when I send it to the ones who email asking about this.
    I'm also going to add to what Dad had originally since I'm getting deeper into this all now with the zfk55.
    Added: Keep in mind that new equipment, powders, primers and technology have appeared since this was originally written.
    You have to apply this logically keeping in mind that there are new innovations since this was written.
    ------------------------------------------------------------------------------------------------
    From my Father:


    My "platform" is the basis upon which all of my load data begins, and it's NOT that hard. You can analyze, illustrate, debate and tweak till the cows come home but it all ends with one single base. Your case preparation.

    My credentials? 42 years of reloading and 32 of those devoted to the 7.5 Swiss cartridge. Load data of mine that was in use long before the manuals figured out that their own data was erroneous and based on the wrong rifle. Do I have any magic? Absolutely not. Is there anything mysterious or technically difficult to understand about how I do it? Absolutely not. Have I varied one iota from my original "platform" in case preparation? Absolutely not.... and yet I see a supposed mystique surrounding the reloading for this cartridge evoking all kinds of semi confusing answers that are completely unnecessary.

    I won't argue with anyone about presses or dies. This is what works for me, take it or leave it. Want to use a different press or die set? Go for it. After all these years and many thousands of successful rounds downrange, I'm not changing anything, however, advances in technology may now dictate other wise to you.

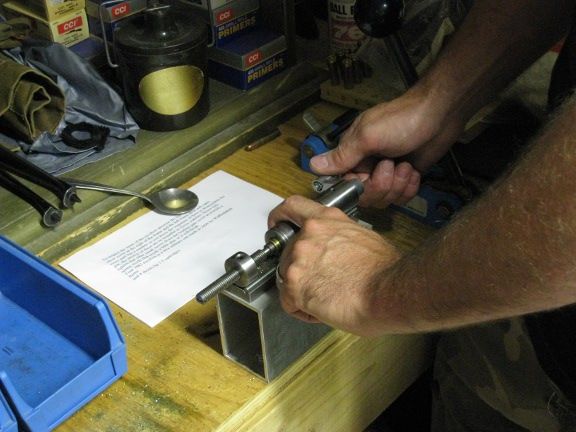
    A) Whatever kind of press you have, using Redding Comp, RCBS dies or your own choice, run the ram all the way up. Turn your sizing/decapping die all the way down against the shellholder. Lower the ram and turn the die down another 1/2 turn or so, maybe even less, but make sure that when you run the ram back up the ram "cams over" at the top of the stroke. This is "full length sizing". I don't want to hear about all of the variables in die setting possibilities with all of the other cartridges you use. For the 7.5 Swiss, make your press cam-over at the top of the stroke to begin. Find a better way for youself later? Why not.
    Neck sizing? Forget it. After very few times fired in a k31 your case won't be chambering anyway. Even if you do neck size, your case will have to be hand-fed into the chamber and indexed to exactly the same "o'clock" position every time to be effective. Not all k31 chambers are identical. I do it with a few of my commercial rifles with some success. 7.5 Swiss? Forget it. Its an exercise in futility that won't shade my loads anyway, and there are at least two local k31 owners that are now believers.
    I've used a myriad of presses, both fixed and progressive over the years and the RCBS Rockchucker was my mainstay for load data development until the Dillon 550B came along. We now use a Forster almost exclusively for precision reloading.
    Though I have a spread of other mfg's dies, Redding comp is all I use for the 7.5 Swiss. I currently have 6 sets of RCBS as well.

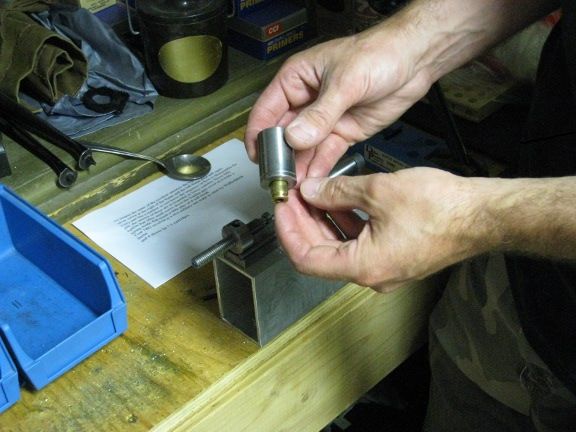
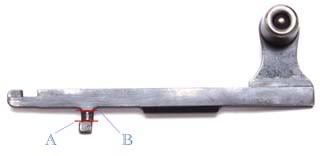
    B) Set your decapper to the proper depth allowing just a bit of the tip to appear through the bottom of the shellholder. Screw it in too deeply and you'll bend the shaft and ruin a case. Lock the die into place.

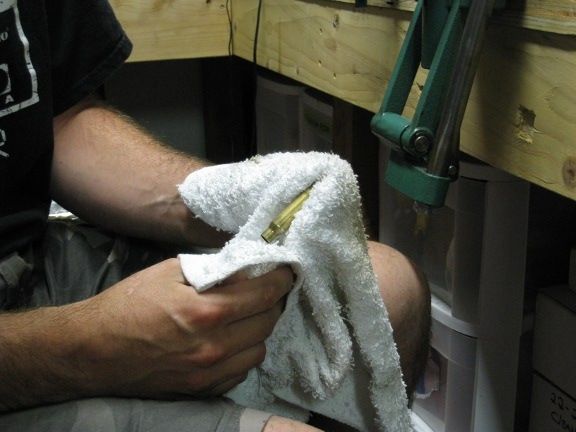
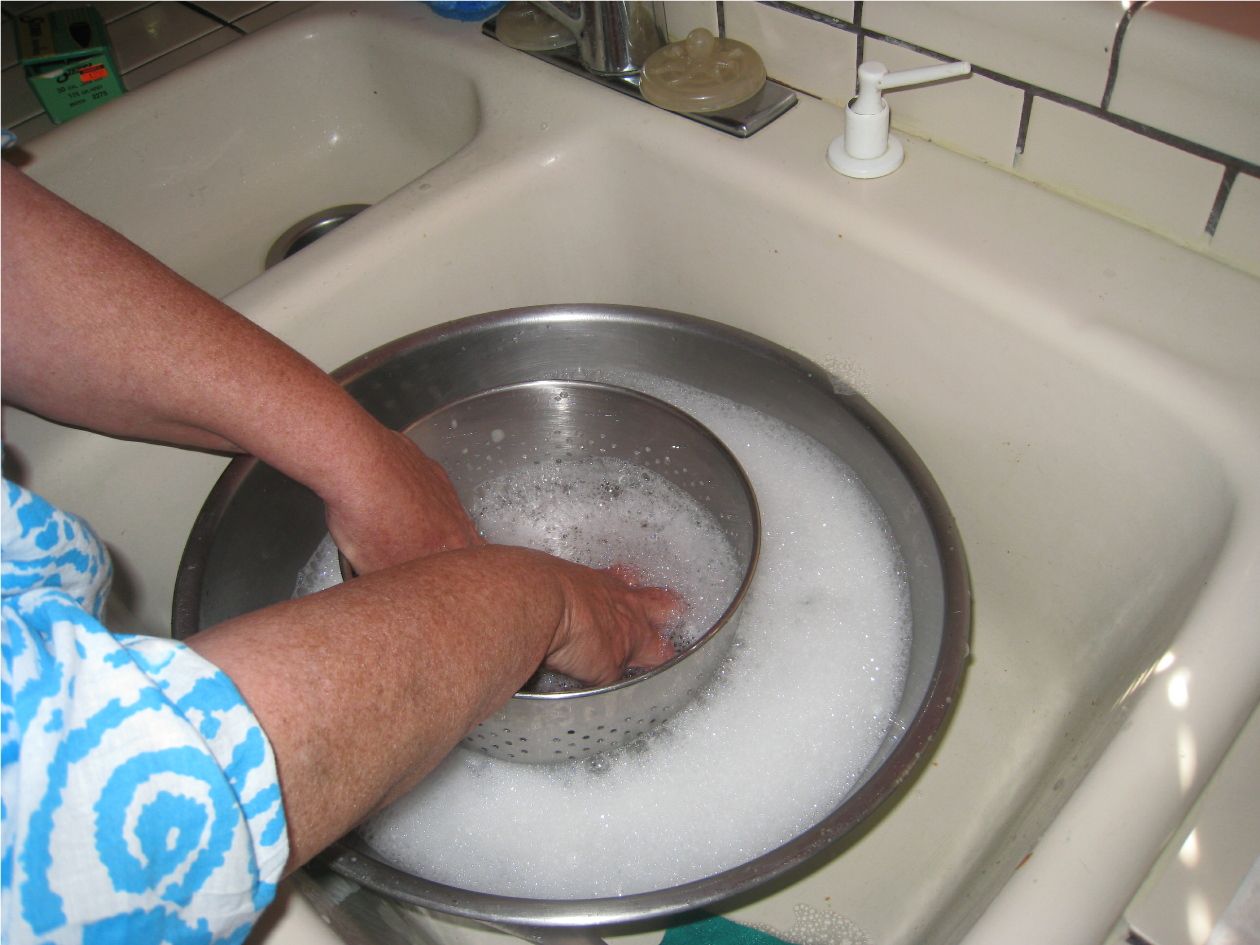
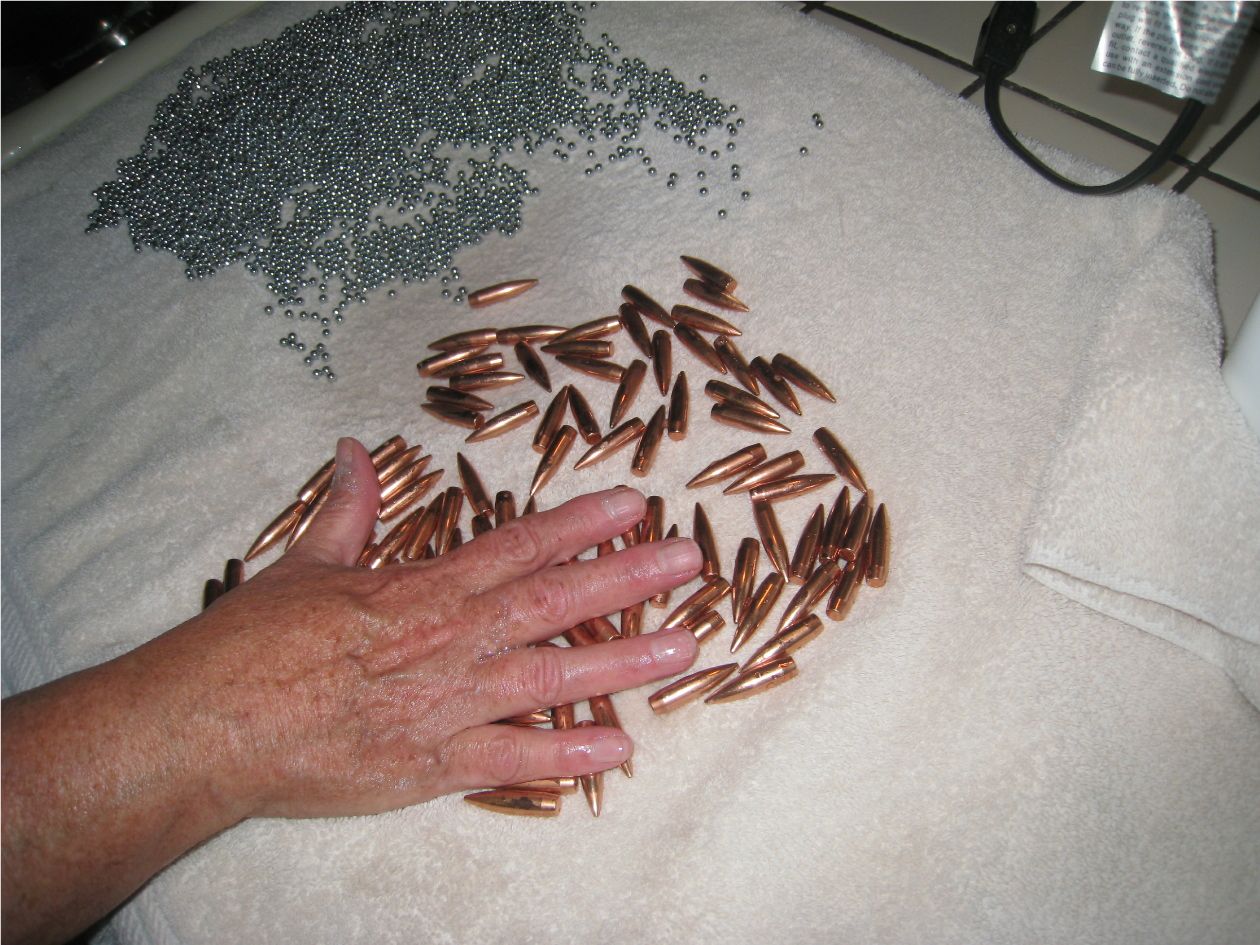
    1) Use a case tumbler or a washing machine to get your brass clean. If its a washing machine, put all the brass in a pillowcase, tie the top and wash them in hot water with a good dishwashing soap. Shake all the water out and let them dry overnight on a towel.

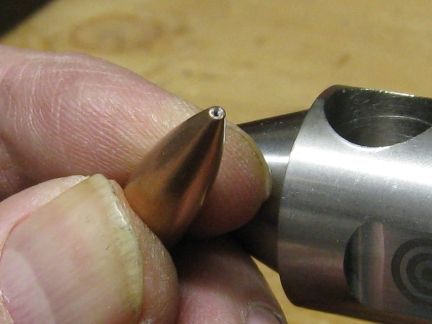
    2) TTL.... Trim To Length. Our spec will be 2.179 or less. I suggest you don't trim much shorter than 2.160.
    Ream and champfer the case mouths. If you don't have that little tool, buy one.

    3) Lubing: Use a case lube/pad combo or the new sprays which I consider superior. Plain old Castor Oil works great too (Now preferred). If its a pad, use your fingers to spread the lube evenly over the surface of the pad and roll the cases completely. Use your finger and tip the case mouth down and roll that too. Don't get lube on the shoulders. This type of lube is non-compressible and can dent your case shoulders upon sizing. Use a mouth brush to get inside, but use it sparingly.
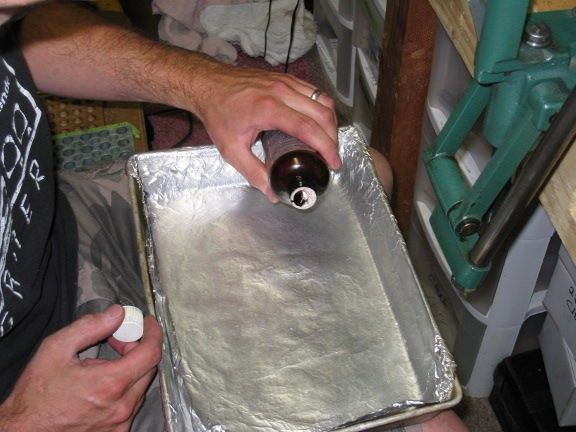
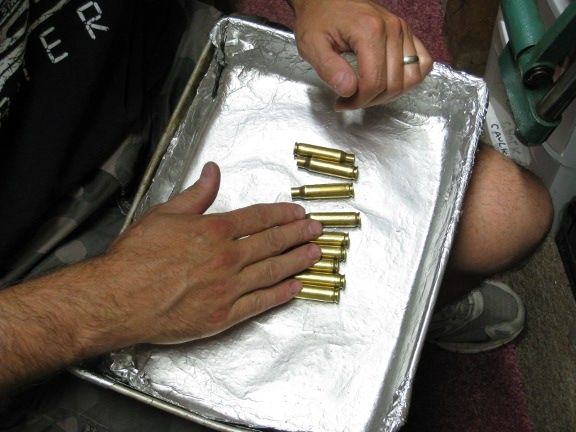
    Spray: Using a cookie sheet, line it with aluminum foil and lay your cases down on their sides with all the mouths facing toward you. Holding the can at a 45 degree angle, spray from the rear of the cases toward the mouth allowing spray to enter the case mouths. Using the flat of your hand, roll the cases around and hit the case mouths once more very lightly. If it's to be Castor Oil, use it sparingly. It goes a long way.
    Spray lube and Castor Oil are not of the non-compressible variety so you won't have a problem with the case shoulders as long as you don't overdo it..

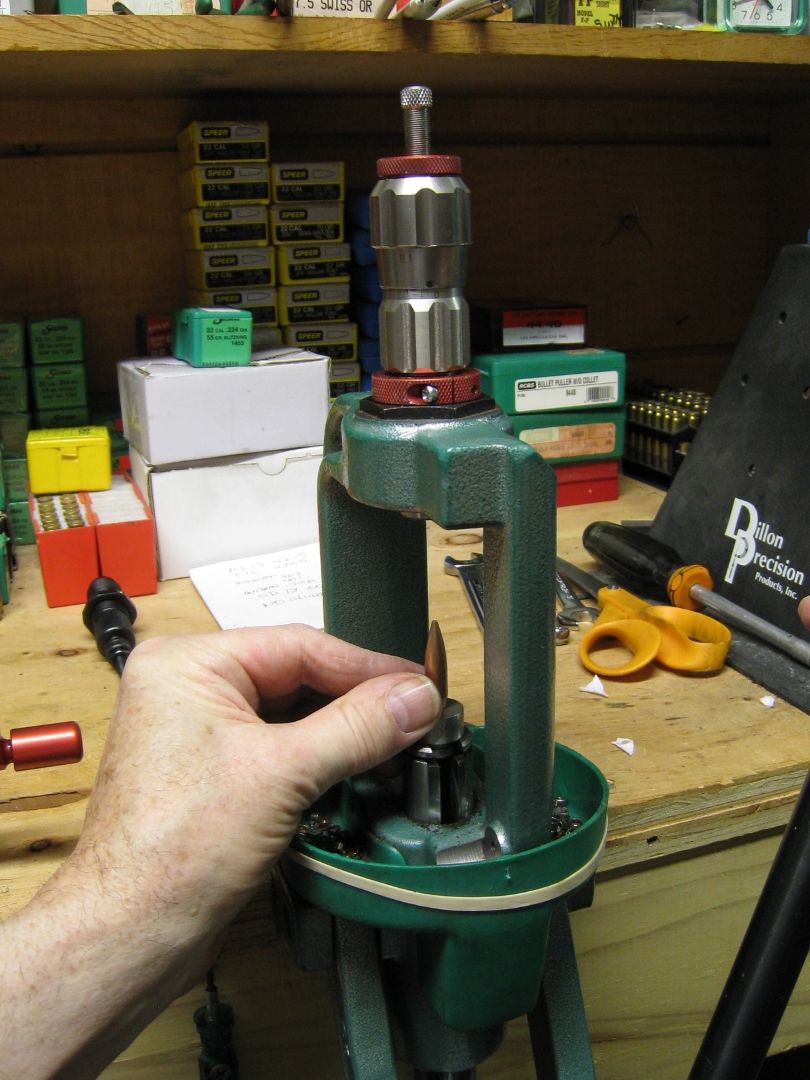
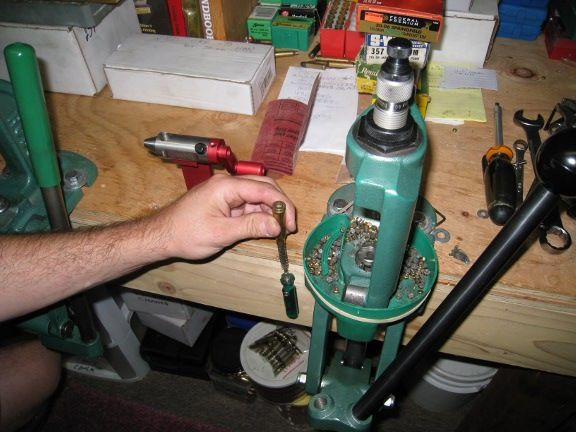
    4) Lightly coat the inside of your die with spray lube. Do NOT do this with paste lube. Put a case in the shell holder and run it up firmly but gently. If you feel any resistance, STOP! Lower the ram and check the depth of your decapper. Check to make sure the inside your die was actually polished at the factory. This is not at all unheard of. I've gotten 3 of these over the years and they will not allow you to run the case in.

    Assuming your ram cammed-over at the top of the stroke, you should now have a properly sized case that will chamber without any resistance in your chamber.
    Have to hit your bolthandle with the palm of your hand to get it to chamber? Projectile seating aside, it won't be because you didn't size your case correctly.
    I've read plenty of rationale on chambering, and (without telling you how many Swiss rifles I have) None of mine chamber other than smoothly and easily, without rapping.

    5) Clean your primer pockets with the appropriate tool. I use the small, formed wire brush in a plastic handle meant for this procedure. Seat your primers dead flush with the case base.

    6) Projectile seating: It is not at all necessary to crimp for the 7.5 Swiss rifles. Crimping introduces a variable that you don't need. The grip of the case mouth on the bullet will not be identical every single time, thus, the unwanted variable.
    To determine proper seat depth for any given projectile, keep in mind that the measurement is only valid when the contact of the bullet's ogive and the lands/grooves is determined.
    Your manual says OAL is 3.020?... maybe for that bullet that they used, but only for that bullet profile, not all others. Projectile profiles vary from mfg to mfg. So how do you do it?

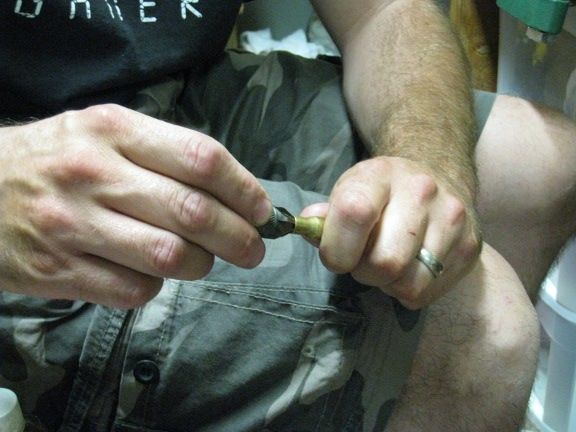
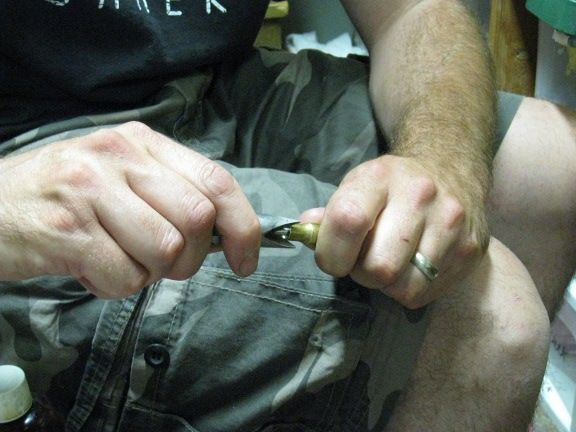
    There are any number of ways, but I've always used the same methodology. Take a sized, empty and unprimed, uncharged case, start a bullet into the case mouth leaving it protruding further than is apparently correct. Place it in the rifle's chamber by hand, ease the bolt into full battery and "smartly" eject it. Measure that OAL and seat it 2 to 4 thousandths deeper. This is a good start. Later, when you've become more deeply involved in data gathering, you may want to play with seat depths to find the sweet spot for your cartridge. I have specifics I use regularly. Bear in mind that the k31 has a short throat, and the k31 typically prefers the ogive very close to the lands.

    Yes, there are other ways. If you like your way better .......use it.
    Once you determine your chambered OAL for that bullet, screw your seating die down until the mouth of an empty case stops the descent and back it out a full turn. Lock the die in place and back out the seater.

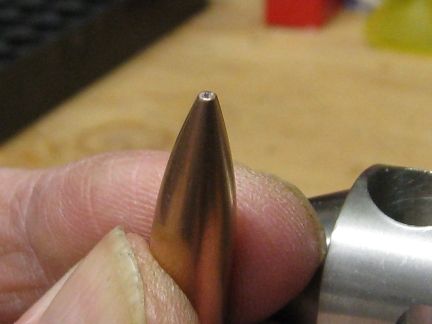
    That method is only going to work for one bullet profile, and it its a hollow point its not going to be accurate anway since not all meplats are the same even in the same box. Your bullet seater should be indexed behind the tip ahead of the ogive, not on the tip of the bullet. A Sierra 175 MK is not going to be the same as a Berger 175 VLD at all. Both should index on an area ahead of the ogive, but not all ogives are the same distance from either the case mouth or the bullet tip. If you use just the tip you're going to have two completely different freebores for the same caliber, weight and charge with likely two different results.

    Now measure it and decide how far off the lands you want to begin. Note that figure and begin working out your load, adjusting seat depth as you go. But remember that was only for that bullet profile. Change profiles and you're back to square one.

    Find load data that might be in a trusted manual or proven data from the board. Always begin with a lesser load even if the data you find "appears" to be proven.

    "Stand up and shoot it like a man!"
    Only if Jeff Cooper is watching, otherwise use a bench rest when developing your load data. Use the same rest or bagging methodology every time you shoot. Remove all variables from your data gathering..... and that's the secret, gents. Consistency. Consistency.

    Ok, the final step I consider important if you're striving to squeeze every ounce of accuracy out of your Swiss rifles is.............. www.swissrifles.com/sr/pierre/accurizing.html

    Does it work? You'd have to ask those who have used the methodology, and there are a lot of them now. I have read a few comments about how it "didn't work for me. A waste of time". It probably was, for those folks. They didn't follow the process correctly and most likely were shooting unproven loads with improperly sized cases or stocks with an unnoticed, inherent problem. All of my rifles are accurized, and every one of them improved forthwith.

    To wrap this up, I advise that you remove every single variable that you can think of. When reloading, never vary from your case prep (hopefully successful) formula. When shooting for load data, never vary from your shooting stance/position. Record results from every single target you print. Be careful and I wish you success.

    P

    -----------------------------------------------------------------------------------------------------

    There are a lot of ways to get to the same positive end result. This is one that worked for him, and it works for me with Swiss Rifles. If you find better ways, use them, but be careful. Use manufacturers books and read the cautions and limits.
    I should add that we now use Redding Competition bushing dies for almost everything including 7.5 Swiss.
    Last edited by Latigo; 01-27-2012, 9:24 PM.
    Latigo and P
    An'' ole' Brer' Rabbit...... he set in de bushes..... he watch an' he wait... lay low an' he don' say nuffin'.

    www.swissproductsusa.com
  • #2
    Latigo
    Senior Member
    • Feb 2011
    • 2121

    Projectile prep for reloaders

    Anything out to 200 we won't necessarily do this, but beyond that range we would.

    This is our process. Your's may vary, but this has proven itself for us.

    Projectile prep:

    We only use Berger VLDs, but Sierra SMKs work really great too.
    Our method is to begin with meplat trimming. We use the Hoover. Buy the sort that indexes on the ogive, not the base of the bullet. That's going to be very important when you cross reference/compare actual seat depth from the ogive to COAL, cartridge to cartridge later.

    Untrimmed


    Trimming process.


    Trimmed


    We then use a Hoover Pointer to reshape and center the hollow point and we taper it down to an opening that's approximately twice the thickness of the jacket wall.

    Pointing


    Pointed correctly


    This is only the beginning of our overall case/projectile prep process.
    Latigo and P
    An'' ole' Brer' Rabbit...... he set in de bushes..... he watch an' he wait... lay low an' he don' say nuffin'.

    www.swissproductsusa.com

    Comment

    • #3
      Latigo
      Senior Member
      • Feb 2011
      • 2121

      Case Prep
      -----------------------------------------------------
      The first step is lubing, and we use Castor Oil. Yeah, I inow. There are many hundreds of threads and thousands of posts all over the net about "the" best lube. Want to waste your money? Go for it. None of them beat Castor Oil. Its cheap and takes no more than 3 drops to do 100 cases. We line a shallow baking pan with foil, a few drops of Castor Oil, roll them around a couple of times and that's it. This is just for a demo. We ususally do 100 at a time.


      We use a side bench mounted neck lube brush that has a miniscule amount of Castor Oil on the bristles applied with fingers.

      Resize and de-cap the primer, then...... remove the expander rod. Resize with a bushing die of the right diameter. We have a seperate press for each process, but if you don't you'll need to go through the sizing process twice, once with the Expander/De-capper and once with the bushing die. We use Redding Micro's for both processes.


      A quick wipe.............


      And on to the Wilson Trimmer. Use what works for you, but whatever it is, be certain that there is not one iota of variance case to case.


      Continued
      Last edited by Latigo; 03-03-2012, 7:18 AM.
      Latigo and P
      An'' ole' Brer' Rabbit...... he set in de bushes..... he watch an' he wait... lay low an' he don' say nuffin'.

      www.swissproductsusa.com

      Comment

      • #4
        Latigo
        Senior Member
        • Feb 2011
        • 2121

        Continued


        Ream and Champfer gently. There's no need to be aggressive with the brass.


        Insert primers. For this process we use the Forster and it's be dedicated to two processes, one of which is primer seating.


        I've purposely ignored primer pocket truing and I'll explain why later.
        For projectile seating we use the Redding Micro and that, for us, is critical.


        We have electronics, but for precision reloading we use a very long I beam scale.

        Next will come seat depths and primer pocket truing.
        Last edited by Latigo; 03-03-2012, 7:25 AM.
        Latigo and P
        An'' ole' Brer' Rabbit...... he set in de bushes..... he watch an' he wait... lay low an' he don' say nuffin'.

        www.swissproductsusa.com

        Comment

        • #5
          Latigo
          Senior Member
          • Feb 2011
          • 2121

          The k31 and it's mates, the 96/11, 1911, k11 and the rare (in the US) zfk55 Swiss Sniper Rifle are a rarity in another category. A Military series of rifles rifles designed around a specific cartridge for accuracy and performance. All use the same original GP11 cartridge.

          The intent of this cartridge/rifle mating was to hit a human in the kill zone at range and they performed as intended. Not many production rifles are capable of doing that at real range. The very great majority of these rifles perform exactly as intended.

          Are there rifles that outperform it? Of course there are, but none of them are a standard military issue firearm designed around a dedicated production cartridge for that rifle.

          The purpose of this missive is to illustrate that there are differences between issue rifles and custom made and custom tuned rifles.
          P.W. St.Marie
          Last edited by Latigo; 05-01-2012, 12:49 PM.
          Latigo and P
          An'' ole' Brer' Rabbit...... he set in de bushes..... he watch an' he wait... lay low an' he don' say nuffin'.

          www.swissproductsusa.com

          Comment

          • #6
            Latigo
            Senior Member
            • Feb 2011
            • 2121

            Waffenfett, or Swiss grease

            Written by Guisan:

            The grease is used for three purposes being cleaning, lubricating and protecting and the last can be divided in normal use and storage.

            To start with the cleaning first, before shooting the Swiss run a pad through the bore to clean out the grease there and from the bolt face, they do that with the help of a grease rod, that ones comes with a jag for a pad and a black grease brush.
            Immediately after shooting they run that black brush with Automatenfett through the still hot bore, put some grease on the bolt face and leave it like that. After they get home they clean it all from the grease, get a bore rope or cleaning brush through the bore and after that they lube it all again with fresh grease that stays on till the next shooting match.
            The grease dissolves the fouling and makes cleaning way more easy as using oil.

            Lubricating during normal use is only done on few spots, the most important ones are the flat (or round with the older straight pulls) inside receiver sliding part of the operating rod and the tip of the operating rod where it enters the bolt sleeve groove, that area needs to be lubed well.
            There should be no grease inside the bolt or at the outside but it won't hurt to use a tiny bit in the locking nut area.
            Do not use too much grease, the manual reads for the K31 "battle lubricating"......NONE , so the above is only to make your rifle operate more smoothly with less wear, after all the shooting range is no battle field.

            The protecting part is easy, Automatenfett can be used on bare metal to protect it against corrosion, use it limited especially on moving parts as we don't want sand to stick to these.

            For storage, the -"Parkdienstschmierung" as they say there- it's easy also;
            Barrel inside and outside, greased
            Chamber, greased
            Trigger assembly, inside bolt and hammer piece, NO grease (still the arsenals did not follow that rule that well as examples show)
            Bare metal parts, greased
            Blued parts, greased

            The storage part is the reason why so many new owners of K31's in the USA think that they are in Cosmoline which is not the case, when they have been in storage in Swiss arsenals for a long time they are still well protected by the old yellow Waffenfett, the more recent ones are well protected by black Automatenfett.

            ================================================== =============================

            So your rifle came to you in the usual condition of the k31. Stock a bit beat up but with most of the metal finish intact and sharp, shiney lands and grooves, and you intend to keep it that way.
            Stop and think about this. The rifle came to you in the condition in which the Swiss soldier and Armoury kept it for many years. Is it not then a reasonable assumption that you'd follow the same maintenance ritual that has kept it in that condition for so many years? Maybe, but the average American shooter believes strongly in all of the advertising hype and testimonials to a myriad of maintenance products deemed absolutely necessary to keep a rifle as pristine as possible, few of which are factually relevant to the k31 barrel.

            This was written by my Dad quite a few years ago.

            ------------------------------------------------------------------


            The Armoury and the well instructed Swiss soldier used a product called Waffenfett, or weapon grease. A close and reasonable approximation in the US is Lubriplate 930. The barrel is swabbed with 930, running a patch back and forth followed by a dry patch. At the end of the shooting session while the barrel is still hot or warm, the lubriplate is worked back into the barrel and left that way until the next shooting session when a dry patch is run back through removing the excess lubriplate. That's it. If carbon in the throat and chamber become an issue from firing reloads, use a good carbon remover such as Montana Extreme, but leave the bore alone. It is a fact that excessive bore cleaning with brushes can and will shorten your barrel life.

            If, by shooting reloaded cartridges utilizing copper jacketed projectiles, your bore shows copper fouling, use a product such as WipeOut to remove it. This kind of a product fulfills it's task without continual scrubbing of the bore.

            This may sound like an overly simple approach, and the typical US shooter is usually a ready recipient of industry marketing efforts and barrel maintenance, but use this logic. My 50+ year old rifle came to me with a truly amazing bore. Why would I not then follow the maintenance practices of the Armoury and Soldier that delivered it to me in this condition?
            Last edited by Latigo; 02-25-2012, 10:04 AM.
            Latigo and P
            An'' ole' Brer' Rabbit...... he set in de bushes..... he watch an' he wait... lay low an' he don' say nuffin'.

            www.swissproductsusa.com

            Comment

            • #7
              Latigo
              Senior Member
              • Feb 2011
              • 2121

              Op Rods

              These two points on the lug, A&B are not inherently weak, but are the common place for the Op-Rod to fail if its going to with repeated undue harsh use. Keep in mind the age of these rifles.


              We typically weld the LHO bridge to original Op-Rods, so we have intimate knowledge of the steel and its limits.
              (Thanks Guisan)


              We have Swiss Rifles here in the armoury, and I mean we have a lot of them, all kinds. When in correct mechanical condition not one of them requires undue force to cycle. Extraction is crisp and smooth, and running a correctly profiled cartridge into battery is smooth, effortless and a few at most requiring a solid push for the last 1/16" of bolt travel.

              If your bolt is clean and your cartridges properly sized, seat depth correct for the rifle you'll have no problem running a cartridge smoothly into battery. If you have to slap them in or out, you have a problem and one most likely easily solved.

              Rapping on the bolt handle with anything at all to remove a stuck case is a sure way to stress that op-rod and lug. Never, ever use a mallet or anything else on a k31 bolt handle.
              So how do you remove a stuck case in a Swiss Rifle?

              Try this:
              You need to apply strong rearward inertia to the entire bolt, not just the handle.

              Take the rifle in your left hand, holding it by the mid-foregrip. Place the edge your right hand (like a karate chop) against the bolt handle or you can grip it firmly with your fingers (not quite as effective with that type of bolt), or you can use a small block of wood in your hand to put downward pressure on the bolthandle. Raise the rifle about 18" off the ground and bring it down quickly, rapping the buttstock sharply against the ground while putting hard downpressure against the bolt with your right hand. Do it more than once if you need to, but I can tell you that its worked very time for me for as long as I've been reloading no matter what the rifle. If its a turn bolt action, rotate the bolt handle up and do the procedure. The AR10 is done the same way but just grip the bolt handle like you're extracting a cartridge and pull down hard while striking the butt on the ground.
              Don't do this on concrete for obvious reasons.


              Latigo
              __________________
              Latigo and P
              An'' ole' Brer' Rabbit...... he set in de bushes..... he watch an' he wait... lay low an' he don' say nuffin'.

              www.swissproductsusa.com

              Comment

              • #8
                Latigo
                Senior Member
                • Feb 2011
                • 2121

                This is a touchy subject in some circles, so I'll do my best to avoid any coloration of the history.

                I've been working with Swiss rifles since the late 50s. I've been developing load data since 1963 as the manuals then extant were erroneous in their representaion of both pressures and strength of the receivers. For whatever reason, the manual publishers were basing all of their load data on the Schmidt Rubin model 1889. The GP11 cartridge was the issue cartridge for the Schmidt Rubin beginning with the 1911sr. This is the same cartridge issued today for the PE57 autoloader and the predecessors, 1911, k11, k31 and the Sniper zfk3155.

                Does it not then stand to reason that the 1911 and k31, being designed to fire the same cartridge as the PE57, would have receivers of a strength equal to the modern autoloader? Would it surprise you to know that the factory in Bern offered the k31 in 7.5 Swiss, .308, 30/06 and 300 Winchester Magnum? It still is. You can buy one today from the Hammerli facility. But I digress.

                Early reloading manuals assumed that the bolts on the 1911s, k11s and k31s were identical to the 1889. Not so at all. The 1889 could NOT stand the pressures developed by the GP11 and therefore the publishers relegated all data and warnings to all of the Schmidt Rubins! Gross error! I dioscoverd this error very early on, called Bern, spoke to an armourer, explained my theory, he agreed and I began a lifelong search for the commercial accuracy loads for the SRs. BTW......... I found it. In fact a number of them.

                The locking lugs on the earlier SRs were at the back of the bolt itself. This meant that the case head of the cartridge was largely unsupported, but with the advent of the 1911 the lugs were moved midway up the bolt proper and provided more than enough support for the case head. The 1911 receiver was also substantially stroner than the 1889, in fact strong enough to allow importers in the late 70s/early 80s to convert a large number of imported 1911s to .308. CUP for the 7.5 is around 42,000. The .308 is 50,000+, so that should also tell you that the 1911 receiver/bolt combo is plenty strong.

                The k31 amd the zfk3155 have the strongest of the bolt/receiver combinations. The locking lugs were moved forward right to the head of the bolt. The 30-06 and 300 winmag are no problem for this rifle. Enough preface.

                The dies.
                I was asked to develop a forum for these rifles about 4 years ago (1999). I spent a tremendous amount of time educating new SR owners who had not a clue as to proper load data or accurizing. (I won't get into the accurizing thing at this point) Having been supplied with load data, a number of these folks began reloading the caliber. Wihin one month I had 3 incidents of "gas blow-by" from those usnig Lee 7.5 Swiss dies. The bolt of the SR provides a channel directly to the rear, allowing blow-by gasses to "kiss" the face of the shooter! Three more incidents followed with another 4 months. FAR too many for coincidence.

                Lee makes an excellent die. I've also been told that the circumstances surrounding the SRs don't happen with all Lee 7.5 dies. I don't know. I also have never had an interest in testing these dies. There's no point. I do assume that there is an inherent problem with using the die for this caliber. I can tell you that my son is not allowed to use Lee dies for reloading his 7.5 Swiss brass. In the past 5 years not one single incident of blow-by has ever been reported to me on swissrifles.com involving RCBS 7.5, Redding Comp or Hornady dies. There are others that work well too. Take your pick.
                I can't tell you how many thousands of rounds in that caliber I've reloaded in 55 years or so, but its a bunch. Never one single failure involving the die has ocurred.

                I'm loathe to retype the whole thing here as its quite long, but please do read the reloading for the 7.5 Swiss page before proceeding with reloading for your rifle. It will give you needed insight into the whys and wherefores.

                Thank you..... Pierre St.Marie

                *NOTE: Its been at least 4 years since I've heard about a Lee problem with this caliber. Maybe it's solved. Latigo *
                __________________
                Last edited by Latigo; 02-02-2012, 7:46 AM.
                Latigo and P
                An'' ole' Brer' Rabbit...... he set in de bushes..... he watch an' he wait... lay low an' he don' say nuffin'.

                www.swissproductsusa.com

                Comment

                • #9
                  Latigo
                  Senior Member
                  • Feb 2011
                  • 2121

                  Past Load data

                  Note: CalGuns cannot be held responsible for the use of posted load data.
                  This data is applicable only to the rifles noted and tested. You're may vary, so always approach unknown load data with caution
                  ============================================
                  These are pages of load data that my Father compiled over a lot of years. These represent many thousands of round downrange. These are the end results of the best performers over that time span using the "projectiles and powders of the day."

                  ALWAYS begin with the data in a manual and work your way up.
                  I will later add our latest successful projectile and powder combinations. I will also add the ICP (Impact Coated Projectile) processes we now use.

                  --------------------------------------------------------------------------------------

                  Pierre's 7.5x55 Reloading Data
                  I don't feel comfortable "recommending" load data for rifles of which I have no personal knowledge, therefore, this is my disclaimer prior to
                  posting my own load data. Particularly if you are a reloading novice, this is important. Your k31 is not a new rifle. These powders/projectiles are! Not
                  knowing the particulars of your rifle, I can only say how these loads performed in MY OWN RIFLES! They may not perform the same in yours. I can say
                  that these loads performed slightly differently in each of the three k31s concerned. This would be because not all barrels are absolutely identical. You
                  MUST approach these loads with caution, approaching them in .5g increments. We all love these old SRs, but no one knows what stresses your action
                  may have sustained before you got it, therefore accept the fact that the loads I'll be posting worked for me. They may or may not work for you. You
                  experienced reloaders know exactly what all this means. Consider your own rifle and be safe! Regards

                  All rounds were fired from an "Accurite" shooting device that accepts the entire weapon, allows natural recoil and "contained muzzle jump". Micrometer
                  windage/elevation & "cant" adjustments are used. All shots were 5rd groups from 100yds. Consider temperatures were variable, which may have an
                  effect on your rifle's performance. No extremes, however.

                  Three k31s were used and categorized by their mfg date. Extensive reloading narrowed the projectiles down to two, which worked the best in THESE
                  three rifles. The 165g is a remington .30cal PSPCL. A jacketed soft nosed projectile with flat sidewalls and flat base. The second projectile is a 173g
                  U.S. Military issue "pulled" fmjspbt. I reiterate, the following loads performed well in THESE THREE RIFLES. You must approach these loads
                  responsibly based on YOUR knowledge of YOUR rifle.

                  All three k31s are pristine samples of their genera.

                  k31 #1 mfg'd 1937

                  165g
                  N203......40.5g.........1.69"
                  BLC2......39g...........1.75"
                  3031......36g...........1.8"
                  414.......43g...........1.56"
                  4064......37g...........1.0"
                  4831......47g...........1.13

                  173g
                  414.......43g...........1.10
                  4064......39.............97"
                  BLC2......40g............1.59
                  4350......38.5g..........1.76
                  3031......35.............1.97

                  k31#2 mfg date 1946

                  165g
                  3031......36.2g...........1.85"
                  4064......37g.............1.0"
                  414.......43.1g...........1.65"
                  4831......47g.............1.23"

                  173g
                  414.......43..............1.15"
                  BLC2......40g.............1.83"
                  4064......39..............0.91"
                  4350......38.1g...........1.94"
                  3031......35..............1.75

                  k31#3 mfg date 1955

                  165g
                  N203......40g..............1.98"
                  3031......36g..............1.87
                  BLC2......39.1g............1.40"
                  2520......39...............1.55"
                  4831......47g..............1.30"
                  414.......42...............1.57
                  4064......37g..............1.0"

                  173g
                  4350......38...............1.99"
                  3031......35g..............1.85
                  4064......39g..............0.88"
                  BLC2......40g..............1.65"
                  414.......43g..............1.10"

                  FURTHER TESTING

                  All rounds fired from an Accurite Rest, all groups consist of two five rd groups.
                  Brass, Norma, Projectile- 165g Remington SPLSC & 173g fmjbt, "pulled". Primers, CCI-LR. Brass TTL & champfered inside/outside.

                  165g
                  4831SC........45g........1.65"
                  IMR3031.......35g........1.30"
                  IMR3031.......36g......... .70"

                  173g fmjbt
                  4831SC........48g......... .88"
                  IMR3031.......34g......... .90" in a perfect vertical string.
                  IMR3031.......35g......... .44" & 1 flyer .82" out
                  (second group 3031)....... .71 & 1 flyer .75" out
                  All BLC2 loads exceeded 2"


                  The above loads were the result of EXTREME CARE of each barrel after each group.( brass cleaning etc) Your rifle may or may not show similar taste
                  for these loads, and there are certainly a myriad of other loads that may prove better performers in YOUR rifle. Reload Safely! And good luck!!

                  I never recommend bullet depth seating as it varies slightly from rifle to rifle, (and a projectile jammed tight against the lands/grooves CAN make differences in chamber pressures, although usually not dangerously. This will definitely affect projectile performance.) Partially seat a projectile in an EMPTY UNPRIMED cartridge and ease the bolt forward to full lock. Eject the whole works, measure it with a micrometer and back it off another .019 to .021 or whatever your particular reloading book recommends. The "lyman casting handbook" is a good source of odd reloading info! No, I did not i/o true the case mouths. I developed these loads based on the recommended TTL and used materials & methods allowing me to shoot often without hours of technical fooling around with components. One thing I should have included is the primers were CCI. Sometimes you hear that magnum primers work better with some powders that have burn rates that somehow don't perform as well as you'd expect. This happens to be true, but you need to do those experiments with care. Be careful.

                  Pierre

                  ------------------------------------------------------------------------------------

                  7.5x55 Load Data
                  by
                  Pierre St. Marie

                  All load data printed herein should be approached with extreme caution. The rifles concerned, despite being very strong, are 50 years old. This data has all performed very well in the 1911 and k31 Schmidt Rubins. All of them printed groups of less than 2" at 100yds, and the majority were 1.5" and 1" or less. If you have "proven" load data to add, email mkntraks@digisys.net and we'll place it on this page for the membership.

                  "Proven" means consistent 5 Round groups at 100yds with a minimum 5 separate targets used.

                  Follow all safe reloading procedures and use this data at your own risk.

                  ------------------------------------------------------------------------------

                  Two loads that tested out exceptionally well are:

                  Berger VLD 168gr........47.4gr of IMR4320

                  Berger VLD 175gr........45.8gr of 4350

                  The last one consistently beat the GP11 for me at 300 to 500 yards. All three are winning loads, all things being equal.

                  "Equal" = ALL brass identical TTL.
                  ALL brass full length sized.
                  Seat depths on the VLDs are
                  exactly that of the GP11s @ 3.060
                  Sierra seat depth is 2.890
                  Seat depths are critical for consistency.

                  If you intend that these, or any loads, prove themselves, absolute consistency in every aspect of your loading procedures is mandatory.

                  Not one iota of variance.
                  ---------------------------------------------------------

                  The following loads have all been found to be quite accurate.

                  Remington PSPCL 165gr:
                  N203...................40.5gr
                  BLC2..................39gr
                  3031....................36gr
                  414......................43gr
                  4064....................37gr
                  4831....................47gr
                  2520....................39gr

                  Military Ball 173gr "pulled":
                  414.......................43gr
                  4064.....................39gr
                  3031.....................35gr
                  4350.....................38.1gr
                  4064.....................39gr
                  BLC2...................40gr

                  Sierra Match king 168gr:
                  4064.....................43.9gr
                  4350.....................46.8gr
                  4064.....................37gr

                  Sierra Match king 175gr:
                  4064......................42gr
                  4350......................45.8gr

                  Sierra 165gr HP/BT:
                  4320......................44gr
                  4064......................43.5

                  Berger VLD168gr:
                  4895......................44gr

                  Nominal seat depths for the 1911:
                  3.060"

                  Nominal seat depths for the k31:
                  2.890"
                  -------------------------------------------------------------------------------------

                  Addendum: Here are some recent additions to the list.

                  1. Bullet: Norma 146gr. FJPBT
                  Powder: Vit. N140 49grs.
                  Primer: CCI 200
                  Case: RWS

                  2. Bullet: Sierra 165gr. SBT (2145)
                  Powder: 4350 ACCU 51.6grs.
                  Primer: CCI 200
                  Case: Norma

                  3. Bullet: Hornady 168gr. BTHP (3050)
                  Powder: 47 grs. ROT R903
                  Primer: CCI BR2
                  Case: Norma

                  4. Bullet: Berger 168gr. HPBT/Moly
                  Powder: DuPont IMR-4320 47.4grs.
                  Primer: CCI 200
                  Case: RWS

                  5. Bullet: Lapua D-46 185 gr. (.308)
                  Powder: Vit. N160 50 grs.
                  Primer: Norma LR
                  Case: Norma

                  6. Bullet: Hornady 190gr BTHP(3080)
                  Powder: Vit. N160 51.5grs.
                  Primer: CCI 200
                  Case: Norma

                  7. Bullet: Hornady 190gr BTHP (3080)
                  Powder: ROT R907 46grs.
                  Primer: RWS 5341
                  Case: Norma
                  Latigo and P
                  An'' ole' Brer' Rabbit...... he set in de bushes..... he watch an' he wait... lay low an' he don' say nuffin'.

                  www.swissproductsusa.com

                  Comment

                  • #10
                    Latigo
                    Senior Member
                    • Feb 2011
                    • 2121

                    Accurizing your rifle

                    Accurizing Your Swiss Rifle
                    by
                    Pierre St. Marie

                    I am not at all concerned with the built in accurizing technique of pre-loading the stock. It is now my belief that this accurizing technique from the manufacturer leaves too many variables in the mix. Any flexing of the stock (being in direct, tight contact with the barrel) will change POI at range. If ALL users of the k31 & 1911 were to shoot their rifles with the identical technique, EVERY time, I may not have an argument concerning the armory shim/pre-loading methodology. But............none of us do shoot identically other than those in the shooting clubs, and, I suspect, even those good folks introduce physical variables of their own at times. So...............

                    I've invested quite a bit of time in arriving at a rather simple conclusion I had always known, from experience, to be true as will any odd directional, barely visible warping. "Do not interfere with the barrel". That simple. Of course, none of us want to remove that classic stock and fore grip from the k31s or the Schmidt Rubins, so I did the next best thing. I relieved all reasonable stress contact from the barrel.

                    I did this by designing a "spacer" meant to go between the flanges of both barrel bands. This simple spacer relieved the barrel of any meaningful contact with the stock. If the spacers are used correctly, the fore stock will feel "loose" at the barrel band. Of course, one could rout out the raceway to relieve the barrel, but I am loathe to remove any wood from the stock. Allowing the barrel to vibrate uninhibited definitely tightened up my groups. I had, of course, used a load capable of moa for these tests. This also meant that I could not use the sling in any kind of a bracing action. That would negate my efforts. Now for the second discovery. I found that "balancing" the tang screw against the receiver screw also had an effect on accuracy.
                    To determine spacer width requirements, loosen the screw on the front band until the band retainer will compress and release freely. The space you see between the flanges approximates the thickness required for the spacer. With the spacer(s) installed, the front to the stock should have a bit of "play", so that you can see/feel it move when you wiggle it. The rear band should also NOT grip the stock tightly. It, too should have a bit of play. This will leave the barrel relatively uninhibited by the stock. Also remember not to use the sling to "brace" the rifle. That tension will put pressure against the barrel too. Use the sling just to "steady" the rifle without undue pressure.

                    After installing the spacers, I begin by loosening both screws. I coat the rear screw with LocTite. I then tighten the receiver screw dead tight. I turn the tang screw down tight and back it our 3/4 of a turn or a little better. You'll need to have around 30 dependable loads ready for this test. Definitely do it from a bench rest, and if you have open sights, use a clearly defined target at no more than 75 yards.

                    Fire a group of 3 or 4 rounds. Tighten the tang screw in 1/8 turn increments, repeating the process and, using a new target for each run, note how the groups will spread or tighten to minor degrees. These differences will make themselves manifest at range. Once you find the "sweet spot" with the tang screw, allow it to sit while the LocTite cures.

                    This procedure will be all the more apparent with scoped rifles, but the Diopter and Willaims will also show clearly what a difference can be made. Emails from subscribers to this method have proven to me that this method definitely works. Why "fix something that ain't broke"?......... because mine have the capability to outperform the ones that "ain't broke". The rest is up to the shooter.

                    Something I forgot to add. The k31/55 barrel band does NOT compress the stock tightly against the barrel. At least mine dont. This, and the fact that the bipod is attached to the receiver, tells me that someone in the armory felt that the barrel should be uninhibited too.
                    Last edited by Latigo; 01-27-2012, 7:30 PM.
                    Latigo and P
                    An'' ole' Brer' Rabbit...... he set in de bushes..... he watch an' he wait... lay low an' he don' say nuffin'.

                    www.swissproductsusa.com

                    Comment

                    • #11
                      Latigo
                      Senior Member
                      • Feb 2011
                      • 2121

                      Your k31 bolt. These are the best, and anything from Carlos Diaopter is something you can take to the bank.


                      And contrary to some of the misinformed info about the Scope Mount being a problem to load with a charger.
                      Last edited by Latigo; 01-28-2012, 8:20 AM.
                      Latigo and P
                      An'' ole' Brer' Rabbit...... he set in de bushes..... he watch an' he wait... lay low an' he don' say nuffin'.

                      www.swissproductsusa.com

                      Comment

                      • #12
                        Latigo
                        Senior Member
                        • Feb 2011
                        • 2121

                        Mfg Dates


                        Rifle & Stock symbols


                        Swiss Rifle Comparison


                        Thanks to the SRDC for these.
                        Last edited by Latigo; 01-28-2012, 11:20 AM.
                        Latigo and P
                        An'' ole' Brer' Rabbit...... he set in de bushes..... he watch an' he wait... lay low an' he don' say nuffin'.

                        www.swissproductsusa.com

                        Comment

                        • #13
                          Latigo
                          Senior Member
                          • Feb 2011
                          • 2121

                          hBN Part 1

                          This is somethhing we do for very good reasons, but it's not necessary for your k31. It just depends on how you feel about the rifle and it's longevity.
                          -----------------------------------------------------------------------------

                          I didn't realize how much interest there is in hBN. It really does make a huge difference in barrel life, so I'll repost it and leave it here.
                          Answering email after email from a dozen different boards is getting really to be a chore, so here it is.

                          Both Dad and I consider this procedure to be important for Swiss rifles since barrels are hard to come by and very difficult to replace.
                          Doubly important for those of us who own zfk55's

                          First, an old email response that will help a lot, and its an evolving explanation.
                          ------------------------------------------------------------------------------------------------------------------------------------


                          Ok. Even though the process isn't rocket science, this isn't exactly short. I'm posting all of the info I have from a 2 year period of successfully doing this. The main thrust of hBN is not to improve accuracy, but to prolong barrel life. When properly prep'd and slurry treated, your barrel can double and even triple it's expected accuracy life. These are excerpts from writings and emails to enquirers by my Father.

                          Every barrel in every rifle here but one has been treated. Not one projectile goes down range that isn't hBN inpact coated save those for one solitary Moly dedicated rifle.

                          ----------------------------------------------------------------------------------------------------

                          Your bore is going to make a difference right out of the gate. Both Moly and hBN have specific applications. Lab Grade Moly is typically 99.8% pure with a 1 to 3 micron size. hBN (far more preferrable in most bores) is typically negative 5 micron or smaller.

                          First, hBN. The patent shows it as being most effective on a standard steel bore, and has no effect on a 17-4 S/S Electro Polished bore, this because the negative micron particles cannot ingrain themselves into the surface and create the required ceramic protective coating.

                          hBN is not susceptible to moisture and thus does not allow corrosion to affect the lands/grooves of the bore. This is a rather large advantage over Moly.

                          The process is simple. If you've ever fired a copper jacketed projectile in your rifle, use a water based copper removal specific such as Wipe Out. Whatever you use, make sure its water based and ammonia free. Once you've borescoped and found the bore to be completely copper free, if the bore is .30 caliber, roll a .270 (or whatever, but a bit smaller diameter than your bore) caliber clean swab in a mixture of 100% Denatured Alcohol and hBN. Use a small, sealable pill bottle, glass or plastic to mix and store the slurry. The ratio should replicate a slurry the consistency of whole milk. Run it back and forth through the bore. Within half an hour I fire an impact coated projectile through the bore and that's it. The bore is effectively ceramic coated.

                          Everyone has a methodology and most involve pill bottles in the tumbler suspended in media. I don't. I use 16oz (and larger) plastic jars with screw on lids, and not inside the tumbler in in the media. I made a secondary lid for the tumbler/vibrator on a CNC. Its 1/2" thick Sintra with a 1/4" deep channel cut into the bottom to fit over the inside and outside edge of the tumbler. A 5/16" hole is drilled in the dead center to acommodate the shaft and wing-nut. All four jars are spaced evenly around the shaft on top of the lid. The tumbler is empty.

                          Dillon Commercial


                          Lyman Standard


                          All four (or two) jars are filled to the 1/3rd mark with impact coated .177 steel bBBs. The BBs must be washed in Dawn with no additives or cleaned with a Sonic Vibrator and denatured alcohol. Add a nominal 1.5gr of hBN.

                          Place 50 .30 caliber (or whatever, untouched by human hands) clean projectiles in each jar, add a nominal .5gr of hBN and vibrate for three hours. The jars on top impact coat the projectiles easily 4 times harder and faster than in a pill bottle suspended inside the tumbler in media. Once the lids are screwed down tight, use a 1/2" wide strip of plastic tape around the area between the lid and the jar. Negative 5 micron hBN is so fine it can potentially find it's way through the threads.

                          Use a large slotted spoon, (slotted wide enough to allow the impact coating BBs to fall through, but not the projectile)s to remove the impact coated projectiles from the jars and tumble them in a Terrycloth towel.

                          We begin by stripping the chambers, throats and bore with Wipe Out. Its an ammonia free, water based bore cleaner that removes literally everything. Carbon, copper, any kind of fouling including Moly. We leave the Foam Type Wipe Out in the bore and throat for about two hours then dry swab everything. We do a follow-up inspection for any copper residue with a Hawekeye Borescope. A complete, 100% copper free bore is essential.

                          I wash the bullets in very hot, soapy water with Dawn. I use a bowl with a plastic strainer that just fits in it. Once washed, I thorougly rinse with hot water, not cold. From that point I handle the projectiles as little as possible and then only with disposable latex gloves. Assuming you've already treated the .177 steel BBs, you can put 50 to 75 .30 caliber or 100 smaller caliber bullets in each jar.


                          Latigo and P
                          An'' ole' Brer' Rabbit...... he set in de bushes..... he watch an' he wait... lay low an' he don' say nuffin'.

                          www.swissproductsusa.com

                          Comment

                          • #14
                            Latigo
                            Senior Member
                            • Feb 2011
                            • 2121

                            hBN Part 2

                            -------------------------------------------------------------------------------------------------------

                            (Email update)

                            Mike, we've added to our method just a bit since you read the last email. We now place a thin layer of dense foam in the bottom of the Dillon. the jars are sealed where the top threads down onto the jar with plastic tape to keep any hBN from leaking out. We place the jars on their sides and pack them in with chunks of foam. We place enough foam on top of them so that when the vibrator lid is screwed down they're trapped tightly. This keeps everything horizontal and the bullets stay on the horizontal position. Works much better and you won't need a specialty lid for your Dillon. The attatched pics are of one of our smaller vibrators with two of the older jars we original used. We now use the new jars in the larger Dillon, but they do show how the jars are packed and kept horizontal.


                            With hBN, heat is good but not entirely necessary. We use heat in the form of a Halogen body shop lamp. Placement of the lamp is critical for the well-being of your tumbler. Too close and you'll soften the plastic. Vibrate them for 3 hours. Remove them with a slotted spoon and tumble them in a Terry towel a few times. They'll come out perfect. This horizontal impact coating with steel BBs in a vibrator with no media makes them hit hard and fast, and that's the secret to perfect coating. Even small tipped bullets come out perfectly with no damage to the plastic tips at all.


                            -----------------------------------------------------------------------------------------------------------
                            Latigo and P
                            An'' ole' Brer' Rabbit...... he set in de bushes..... he watch an' he wait... lay low an' he don' say nuffin'.

                            www.swissproductsusa.com

                            Comment

                            • #15
                              Latigo
                              Senior Member
                              • Feb 2011
                              • 2121

                              hBN Part 3

                              This original system we developed works well too. The advantage is that you can add media in the tumbler/vibrator and clean cases while impact coating your projectiles. We still do this once in a while, so we often have both methods going at the same time.


                              This is the original patent if you're inclined to read it all. Sometimes its not easy to find the pertinent parts in all of this dry reading, but its all there. We've made a study of it, and we're very successful doing it. http://www.patentstorm.us/patents/71...scription.html

                              (Another Email excerpt)

                              If not, be safe and use the Wipe Out with a nylon bristle brush, working up a heavy foam and let stand for a few hours.

                              Dry clean completley with patches or clean swabs.

                              Take a new .30 caliber cotton swab, or take your old ones and run them through the laundry or dishwasher. Dry completely.

                              Short switch back to square one:

                              You'll get your hBN in a container with a plastic, tape seal around the outside. Open it with extreme care and only long enough to fill a small, sealable pill bottle 1/3rd full. Re-seal the container immediately. Re-apply the exterior tape seal fully and tightly. Store at room temps in a secure place. Spill that container in a room in the house and your wife will be using a bat on you for weeks to come.

                              (No, I didn't, and my wife uses Darning Eggs instead of bats)

                              Screw the swab to the end of a cleaning rod just long enough to run the bore, open the hBN/Alcohol slurry pill bottle, roll the swab in the hBN/Alcohol slurry, (close the hBN bottle immediately) insert into the bore from the breech end if possible. If your rifle won't acommodate that, run it carefully from the muzzle end. Go all the way through and then work it gently back and forth while slowly withdrawing the swab.

                              The first impact coated projectile fired through the bore will do the ceramic coating for you, and that's it. You've done it. From that point on fire only impact coated projectiles through that rifle. Cleaning is done with dry patches, no chemicals at all.

                              For the chamber/throat area, use the right sized swab to fit into each and use Montana Extreme or a like carbon remover. Don't run any cleaning solvents down the bore.

                              If you feel the need to do that once in a while, cool...... but make sure you use the clean swab and do the hBN/Alcohol slurry process again. It only takes a few minutes. I unscrew the swab and keep it inside the slurry pill bottle so that it remains uncontaiminated.

                              To understand how it works, save me a bunch of typing and read the patent.

                              So how often do you clean an impact coated bore? 50 rounds? 100? 200? 300? 1,000? I don't know yet. No cleaning required so far, and if the patent is correct it will be a long time to come.
                              The Hawkeye Borescope always tells the glaring truth about your bore. After each shooting session I pass one dry patch down the bore, just once. So far in any and all of the bores thus treated.......... no necessity to clean at all. The most amazing has been the little .22 rifles.
                              Latigo and P
                              An'' ole' Brer' Rabbit...... he set in de bushes..... he watch an' he wait... lay low an' he don' say nuffin'.

                              www.swissproductsusa.com

                              Comment

                              Working...
                              UA-8071174-1