
 Tweet
Tweet
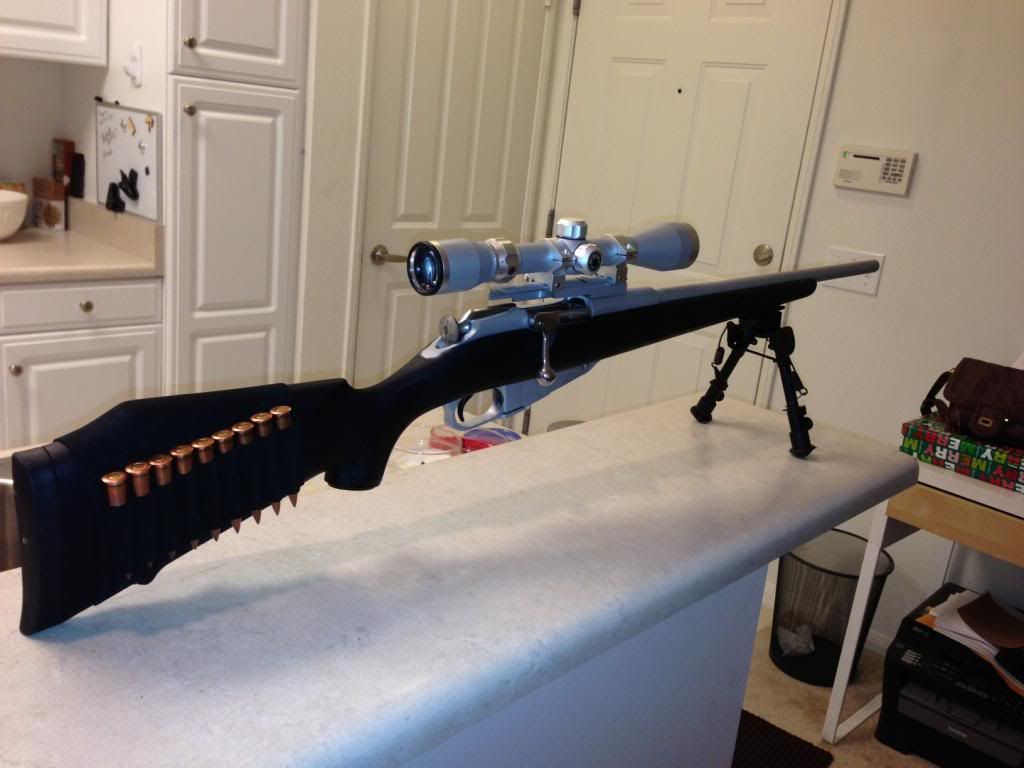
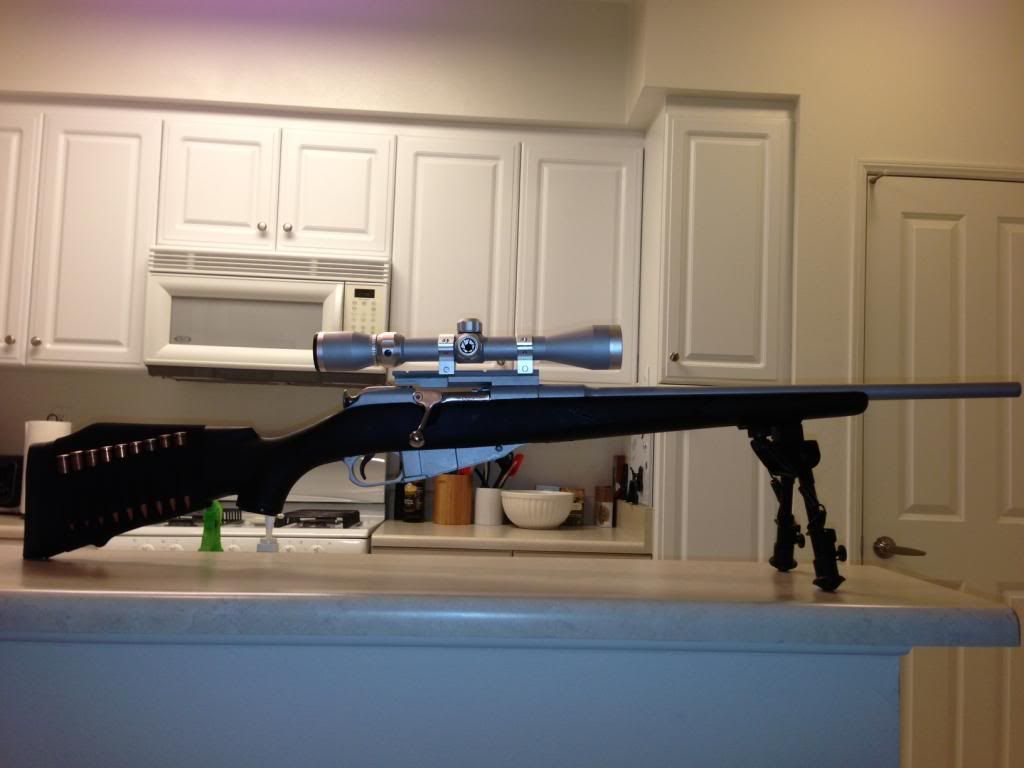
Here's my 1941 MN 91/30;
I got it from Big 5 for $89.99, and it looked like it was worth less than that. It was the only one they had left, everyone else looked at it and put it back. It was counterbored, pitted, force matched, rusty, had chatter marks on the barrel, tooling marks on everything, basically looked like a 100 yr old Mr. Hankey... it was perfect.
I wanted to learn how to work on a firearm without spending a ton of money & at the same time didn't want to make the C&R guys cry over my bubba'ing, so I was pretty pleased with my purchase.
Everything I've done to this was on a budget and I did it all myself. I know I could have put a nicer stock, scope mount, etc. on this, but I wasn't trying to make a sub moa shooter, just wanting to learn how to work on a rifle.
Currently I've done the following;
1. Replaced stock and fitted with ATI synthetic stock (PITA!)
2. Free floated the barrel
3. Shortened to 20" barrel with a hacksaw
4. Recrowned with brass screw and lapping compound
5. Added soda can shim to trigger
6. Added clothesline spring to trigger (to take up slack)
7. Removed chatter marks and other tooling marks (this took forever)
8. Removed rear sight and filed dovetail flush with rest of barrel (was silver soldiered on... PITA)
9. Removed all rust/pitting, sanded smooth, and reblued entire gun
10. Installed ATI scope mount and bent bolt handle (used larger tap/screw set from Lowes for better hold)
11. Polished bore and chamber with Never-Dull (Looks nice and shiny inside now)
12. Polished contact points on bolt
13. Polished contact points on trigger
14. Polished chamber with 20ga bore brush
15. Pillar bedded the action
16. Used bedding compound to flush up the ATI mount to the receiver
17. Painted and baked with gray with high heat rustoleum
18. Haven't done yet but I'm prob going to weld the ATI bolt handle on
I really liked the look of the Mosin when it was all sanded down to bare metal. Had the stainless rifle look. If only it wouldn't rust I would've left it like that. But I was thinking of maybe Duracoating the metal parts in stainless. Anyone have any experience with that color of Duracoat?
I'll get some range report photos on my next trip. I didn't take any on my last trip, but I was getting a group about as big as a tangerine at 25 yards (indoor range) with surplus ammo. So that'd be about an 8in diameter circle at 100 yards, not bad considering that's standing and I'm a novice with a rifle.
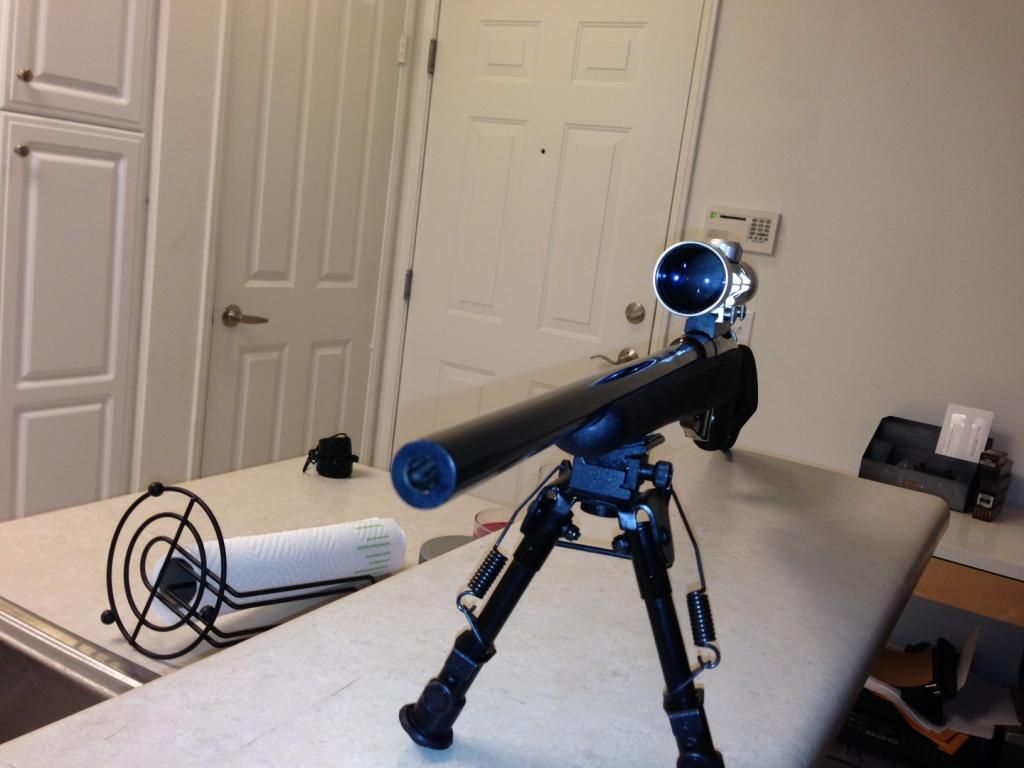
(I really polished the heck out of the barrel before I reblued it)

(The bipod is actually for my AR, hence the funky adapter. I use it on both interchangeably)
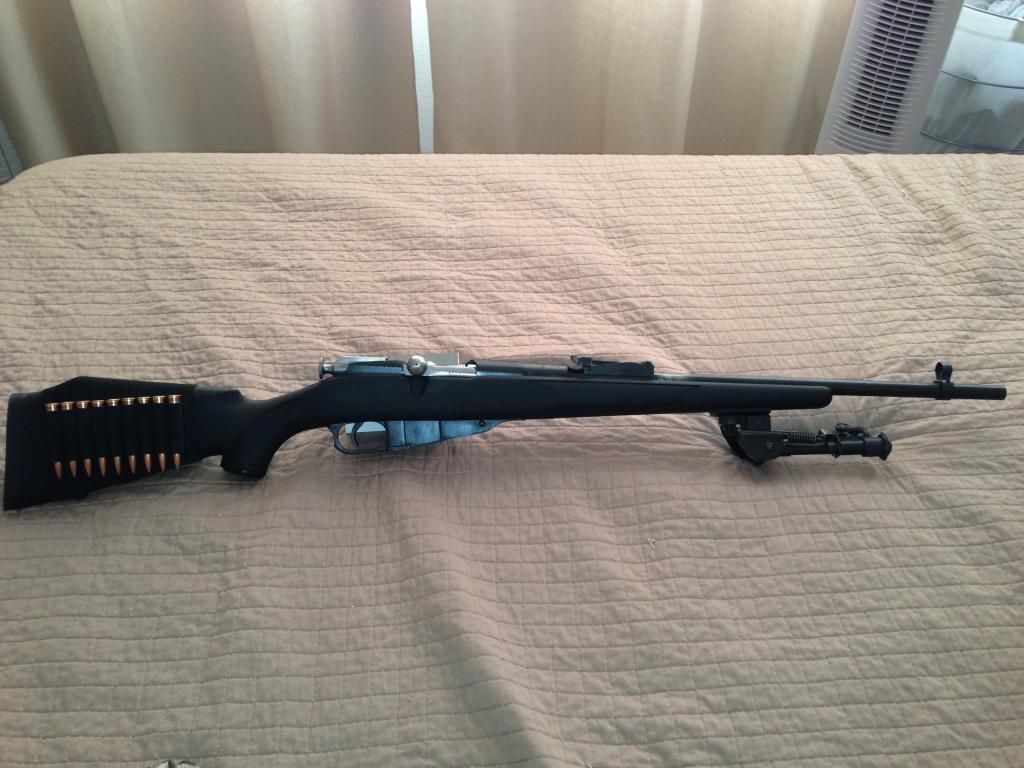
(At first I thought I'd be content with iron sights, but I bought the wrong size Brass Stacker front sight adapter, and I really didn't like the looks)
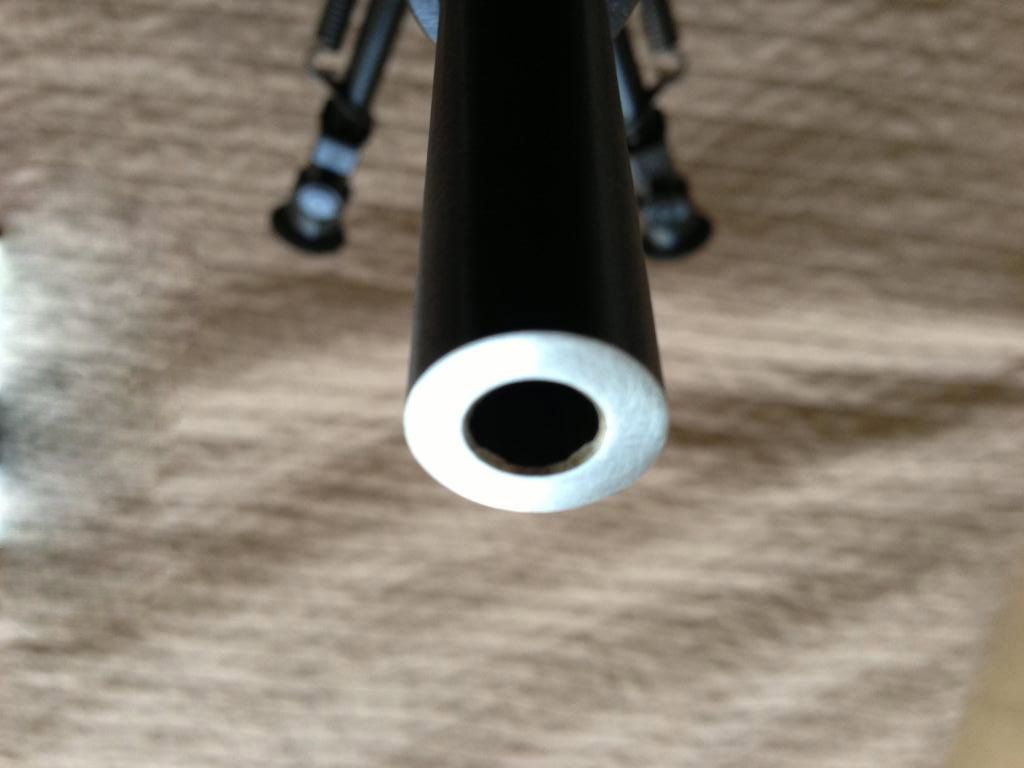
(Here's the crown after using the brass screw)
***
Update:
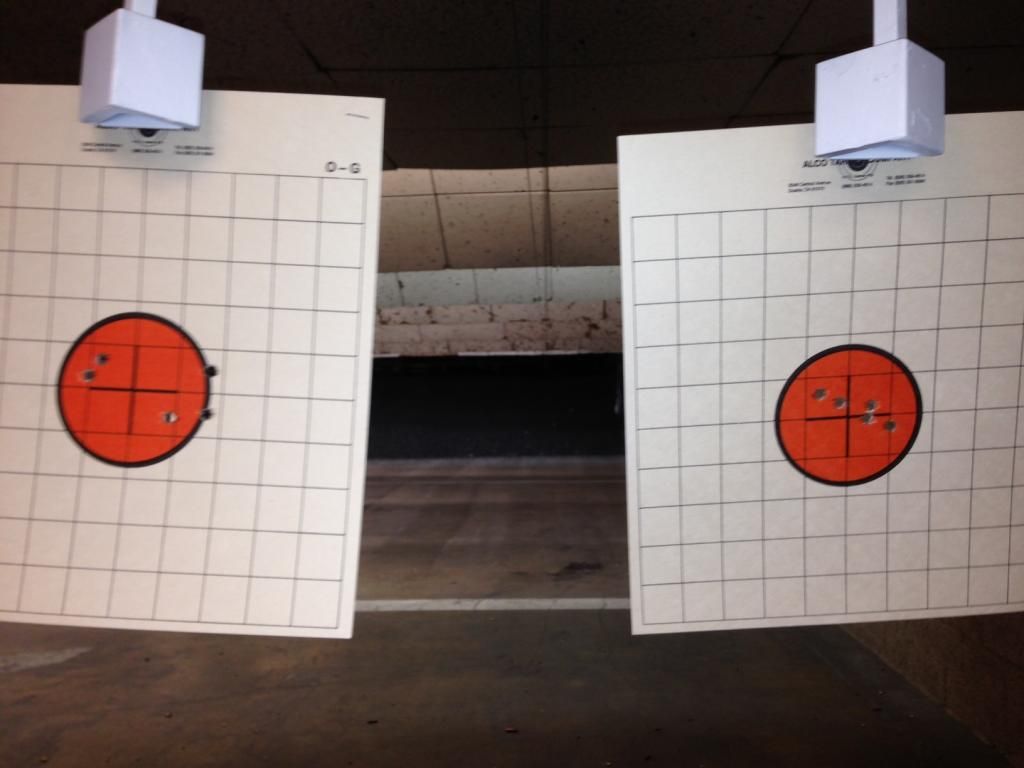
Range report photos;
It's hard to get a good gauge of how well the rifle shoots since I'm just testing it out at my local indoor range, can't shoot it from a bench & limited to 25yds. When I get some time I'll take it up to Burro or Angeles where I can shoot off a bench to get a better assessment of the guns abilities. But for now, just take this and multiply the group size x4 and it'll give you a rough idea of a 100yd grouping.
I got it from Big 5 for $89.99, and it looked like it was worth less than that. It was the only one they had left, everyone else looked at it and put it back. It was counterbored, pitted, force matched, rusty, had chatter marks on the barrel, tooling marks on everything, basically looked like a 100 yr old Mr. Hankey... it was perfect.
I wanted to learn how to work on a firearm without spending a ton of money & at the same time didn't want to make the C&R guys cry over my bubba'ing, so I was pretty pleased with my purchase.
Everything I've done to this was on a budget and I did it all myself. I know I could have put a nicer stock, scope mount, etc. on this, but I wasn't trying to make a sub moa shooter, just wanting to learn how to work on a rifle.
Currently I've done the following;
1. Replaced stock and fitted with ATI synthetic stock (PITA!)
2. Free floated the barrel
3. Shortened to 20" barrel with a hacksaw
4. Recrowned with brass screw and lapping compound
5. Added soda can shim to trigger
6. Added clothesline spring to trigger (to take up slack)
7. Removed chatter marks and other tooling marks (this took forever)
8. Removed rear sight and filed dovetail flush with rest of barrel (was silver soldiered on... PITA)
9. Removed all rust/pitting, sanded smooth, and reblued entire gun
10. Installed ATI scope mount and bent bolt handle (used larger tap/screw set from Lowes for better hold)
11. Polished bore and chamber with Never-Dull (Looks nice and shiny inside now)
12. Polished contact points on bolt
13. Polished contact points on trigger
14. Polished chamber with 20ga bore brush
15. Pillar bedded the action
16. Used bedding compound to flush up the ATI mount to the receiver
17. Painted and baked with gray with high heat rustoleum
18. Haven't done yet but I'm prob going to weld the ATI bolt handle on
I really liked the look of the Mosin when it was all sanded down to bare metal. Had the stainless rifle look. If only it wouldn't rust I would've left it like that. But I was thinking of maybe Duracoating the metal parts in stainless. Anyone have any experience with that color of Duracoat?
I'll get some range report photos on my next trip. I didn't take any on my last trip, but I was getting a group about as big as a tangerine at 25 yards (indoor range) with surplus ammo. So that'd be about an 8in diameter circle at 100 yards, not bad considering that's standing and I'm a novice with a rifle.
(I really polished the heck out of the barrel before I reblued it)
(The bipod is actually for my AR, hence the funky adapter. I use it on both interchangeably)
(At first I thought I'd be content with iron sights, but I bought the wrong size Brass Stacker front sight adapter, and I really didn't like the looks)
(Here's the crown after using the brass screw)
***
Update:
Range report photos;
It's hard to get a good gauge of how well the rifle shoots since I'm just testing it out at my local indoor range, can't shoot it from a bench & limited to 25yds. When I get some time I'll take it up to Burro or Angeles where I can shoot off a bench to get a better assessment of the guns abilities. But for now, just take this and multiply the group size x4 and it'll give you a rough idea of a 100yd grouping.


Comment